Create a Space
The sequence of steps describes an example of how to set up a Space in Element Web.
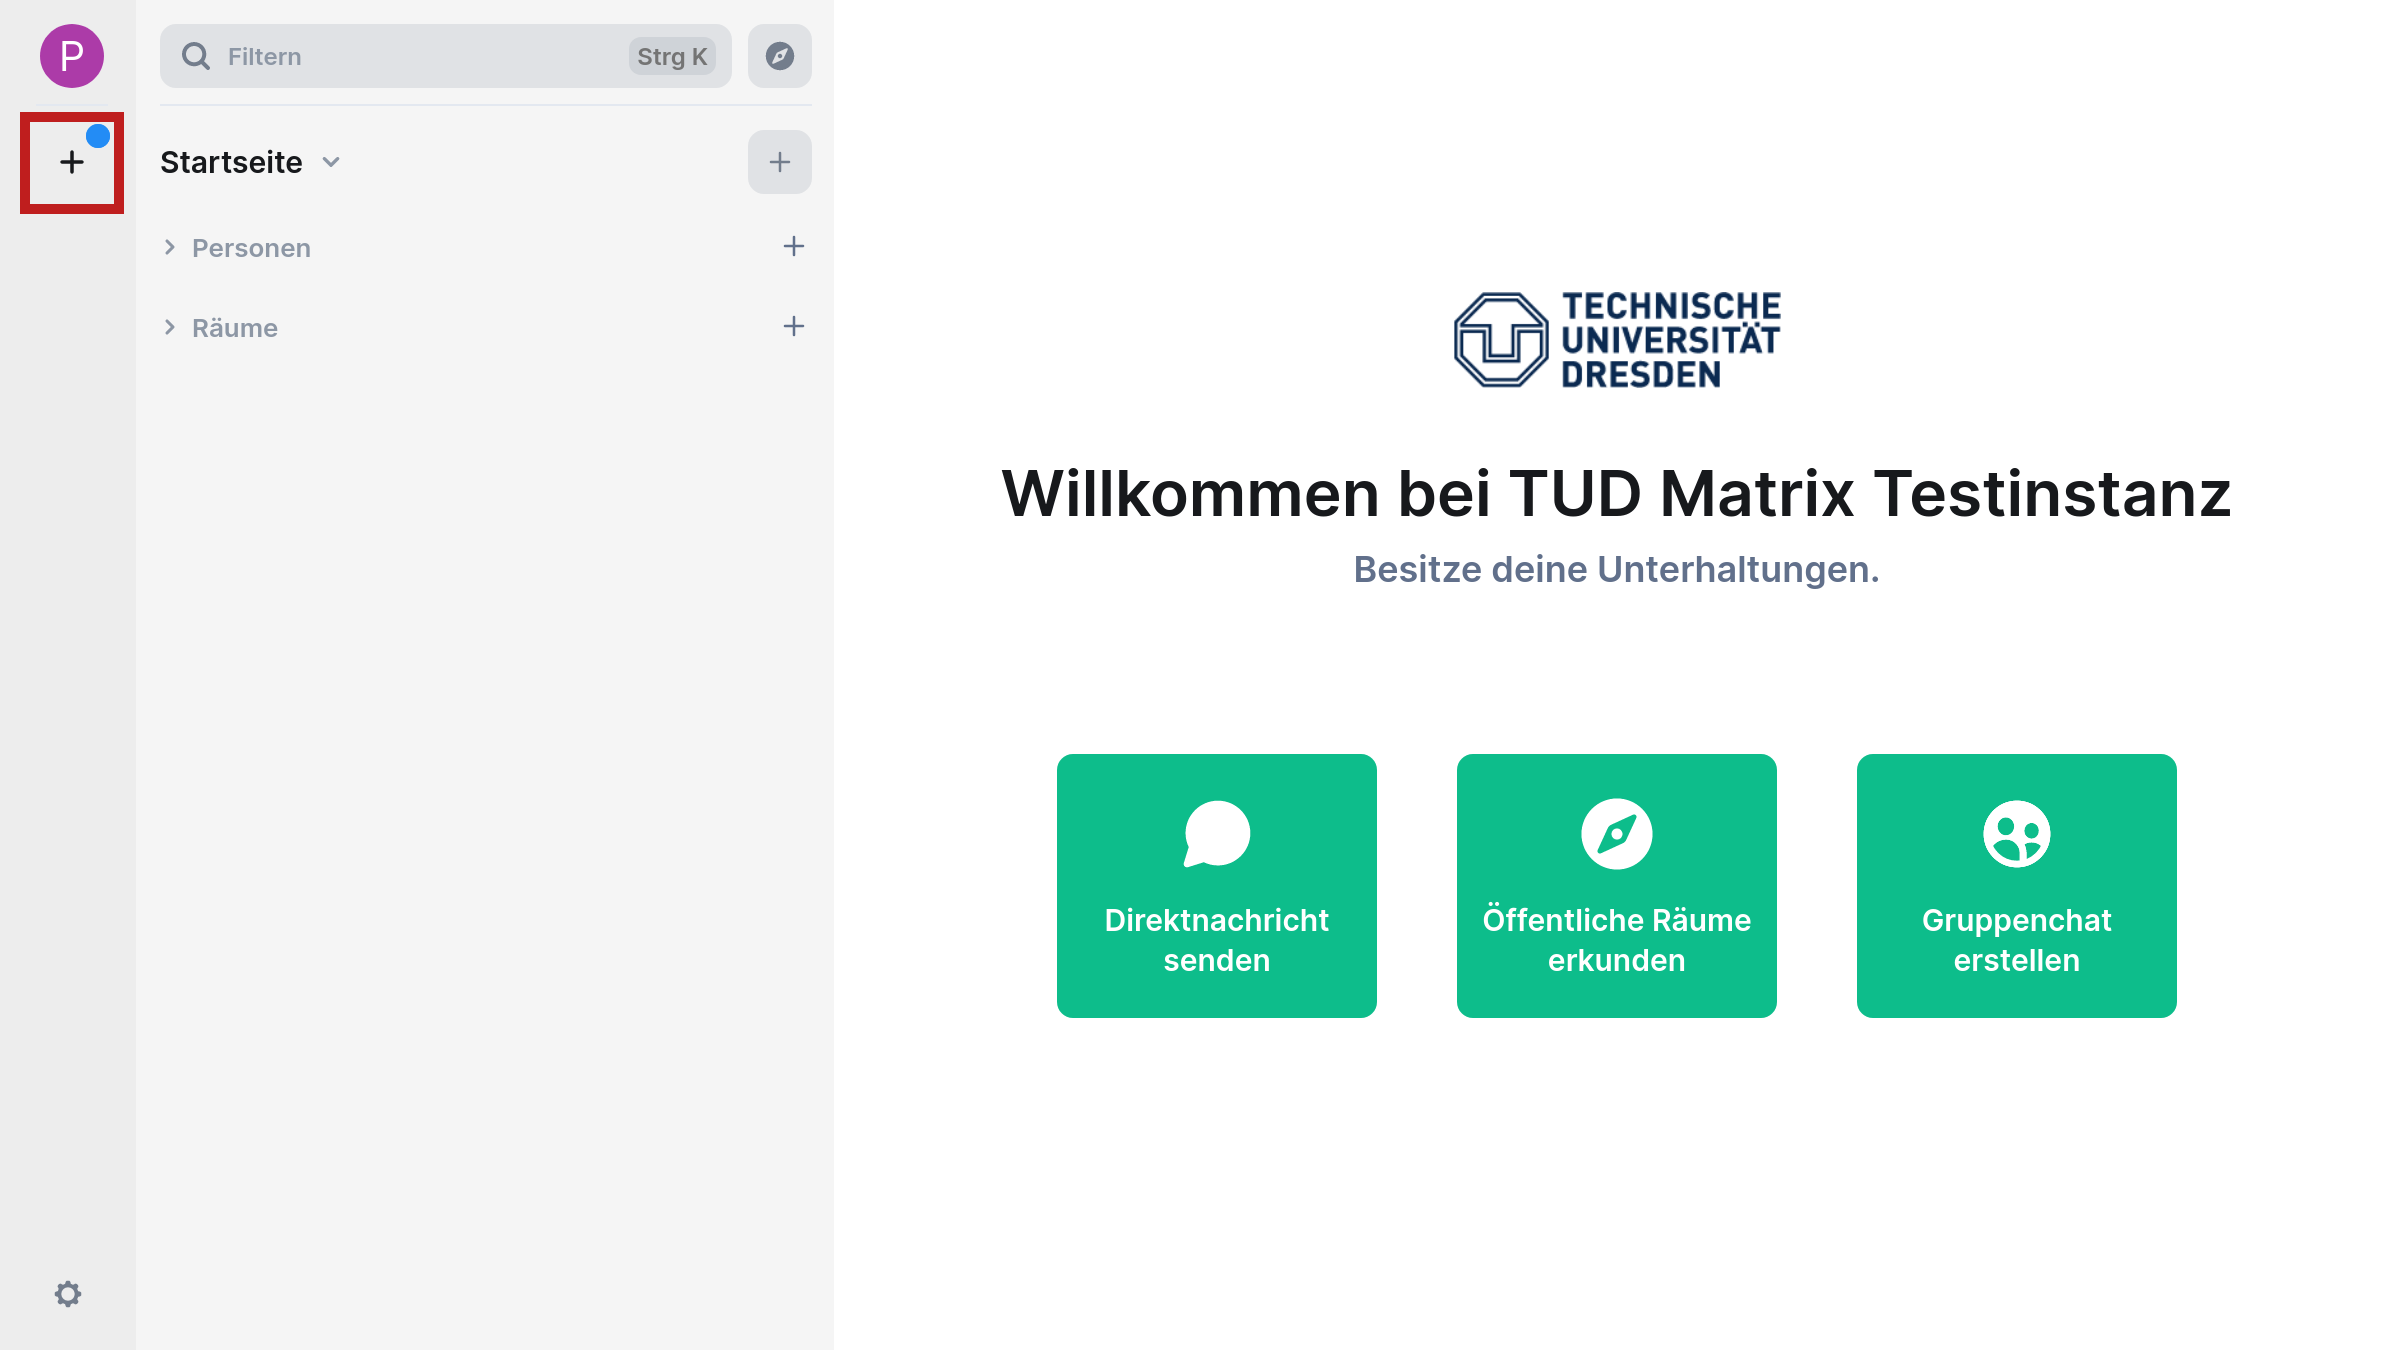
- In the user interface, Spaces are displayed in the first left column. There you will find the plus icon “Create new Space “ below all previous Spaces, you may have to scroll to the end of the list first. Click on the plus icon.
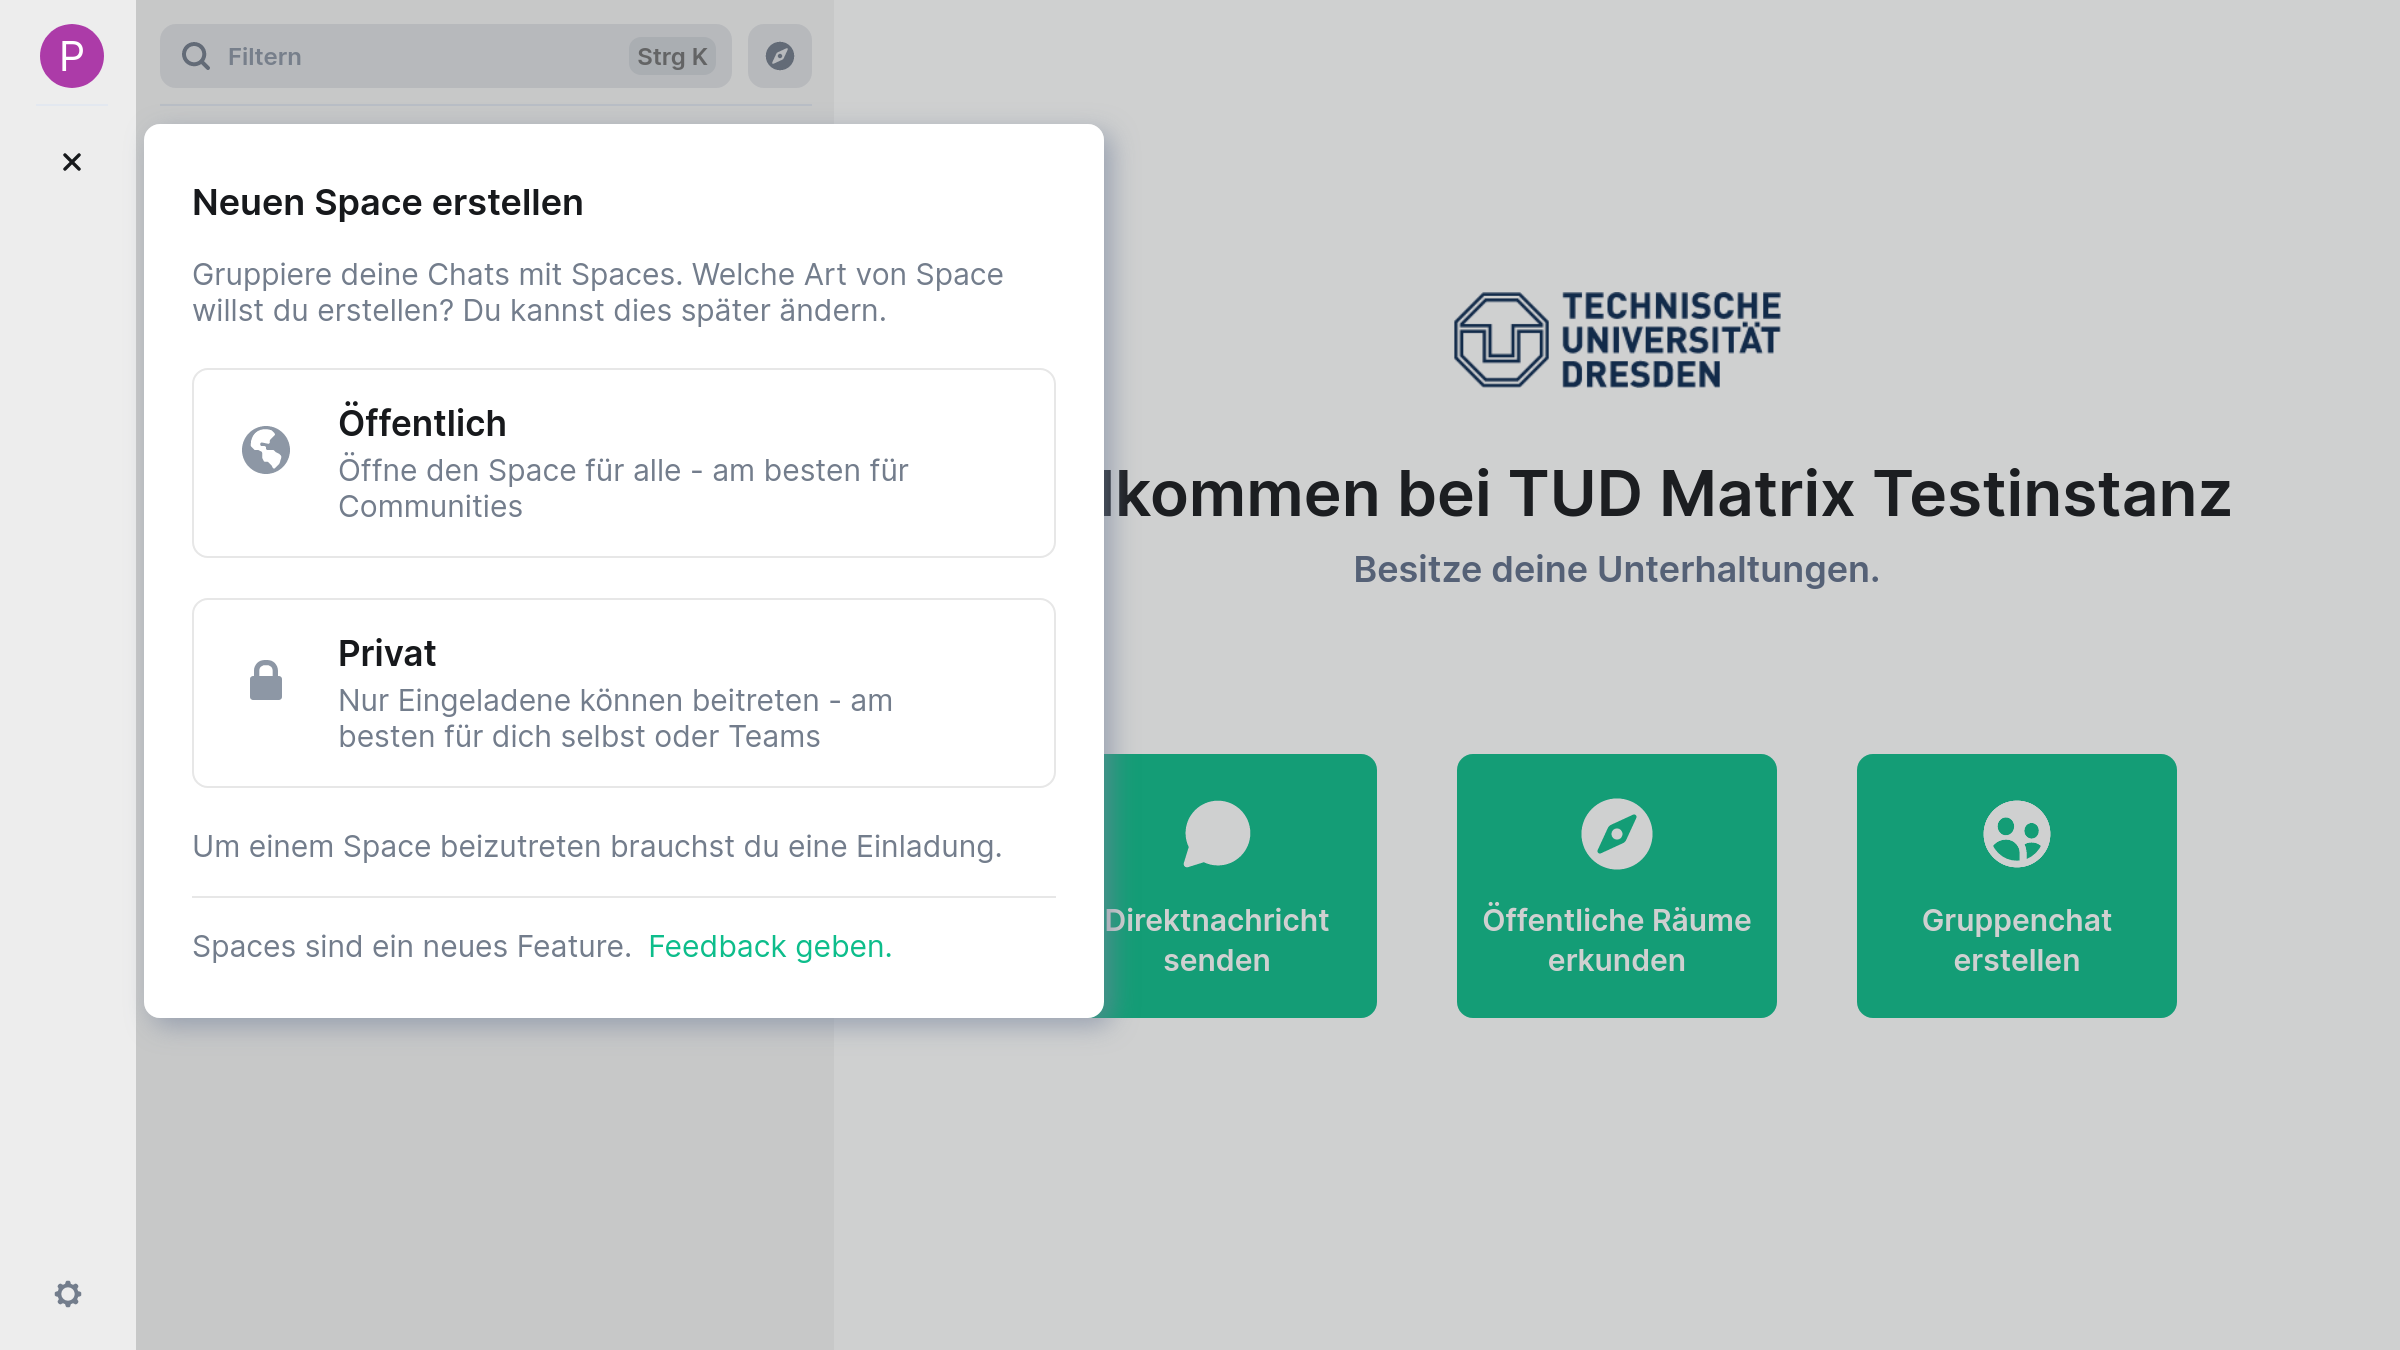
- The dialog “Create new Space” opens. Here you can now select the type of Space: The button “Public” creates a public Space, “Private” creates a private or personal Space.
Public Space
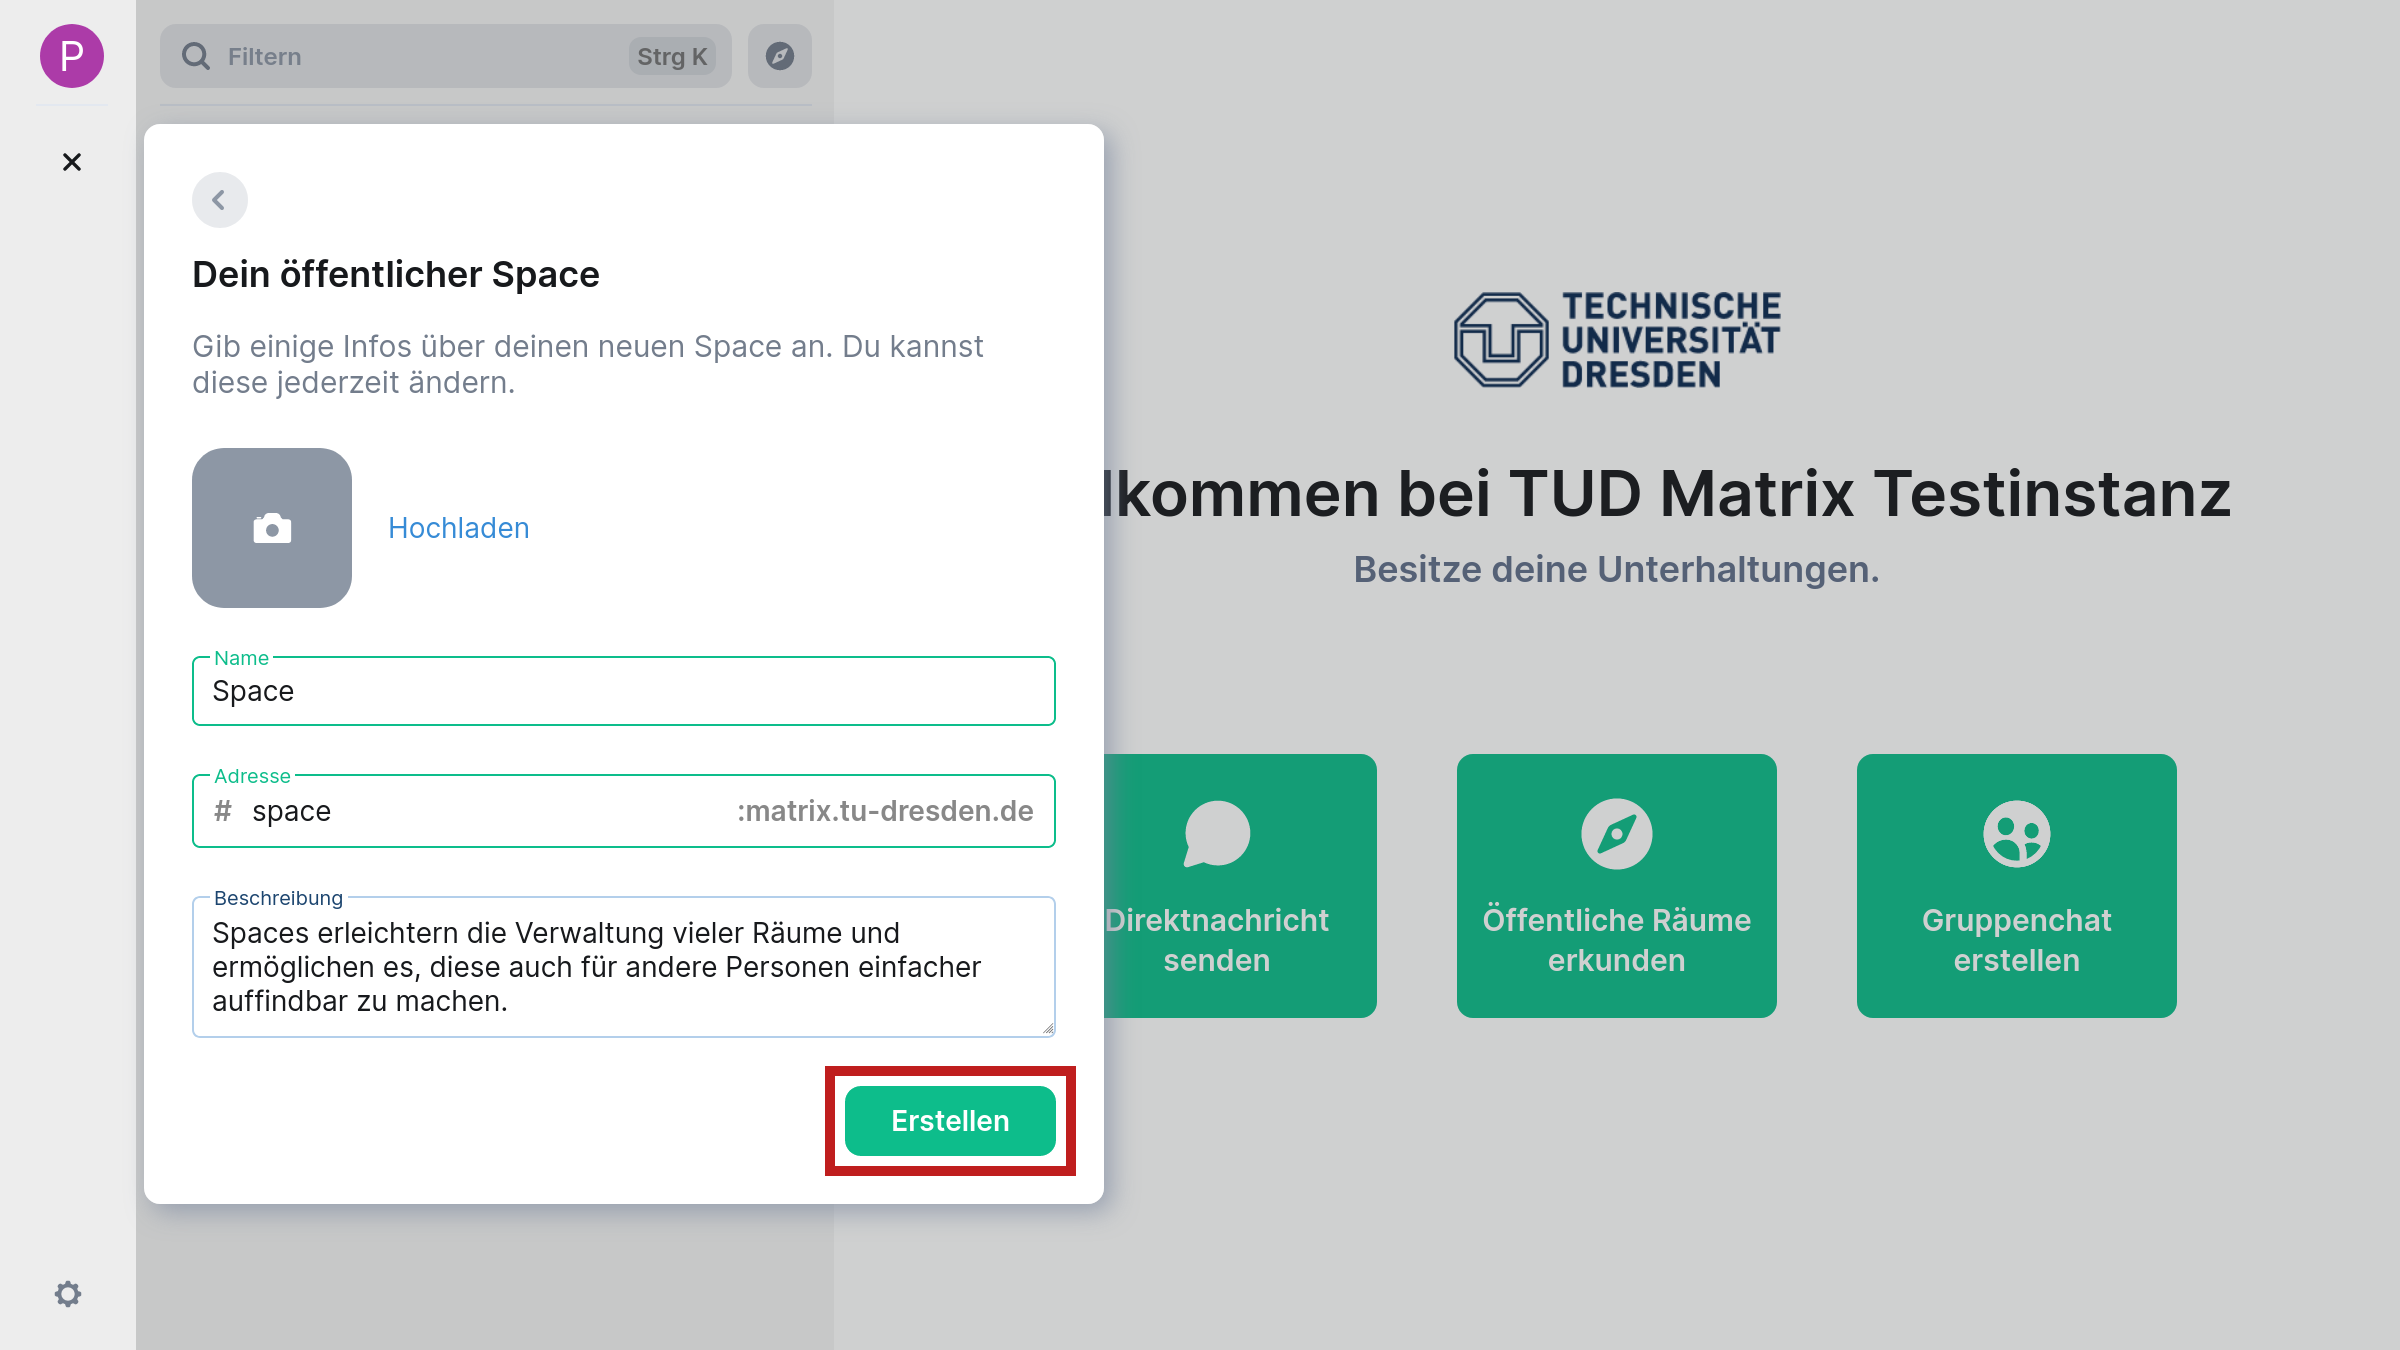
- The “Your public space” dialog opens. Here you can upload a photo by clicking on the “Upload” link. The file manager of your operating system will open where you can select the appropriate file. Enter a name, the address and a description in the respective fields of the same name. The name can be freely assigned, for the unique address a suggestion is automatically created based on the name. If the address text field is activated, a tooltip shows the availability of the address. If everything is entered according to your wishes, “Create” the Space by selecting the button of the same name.
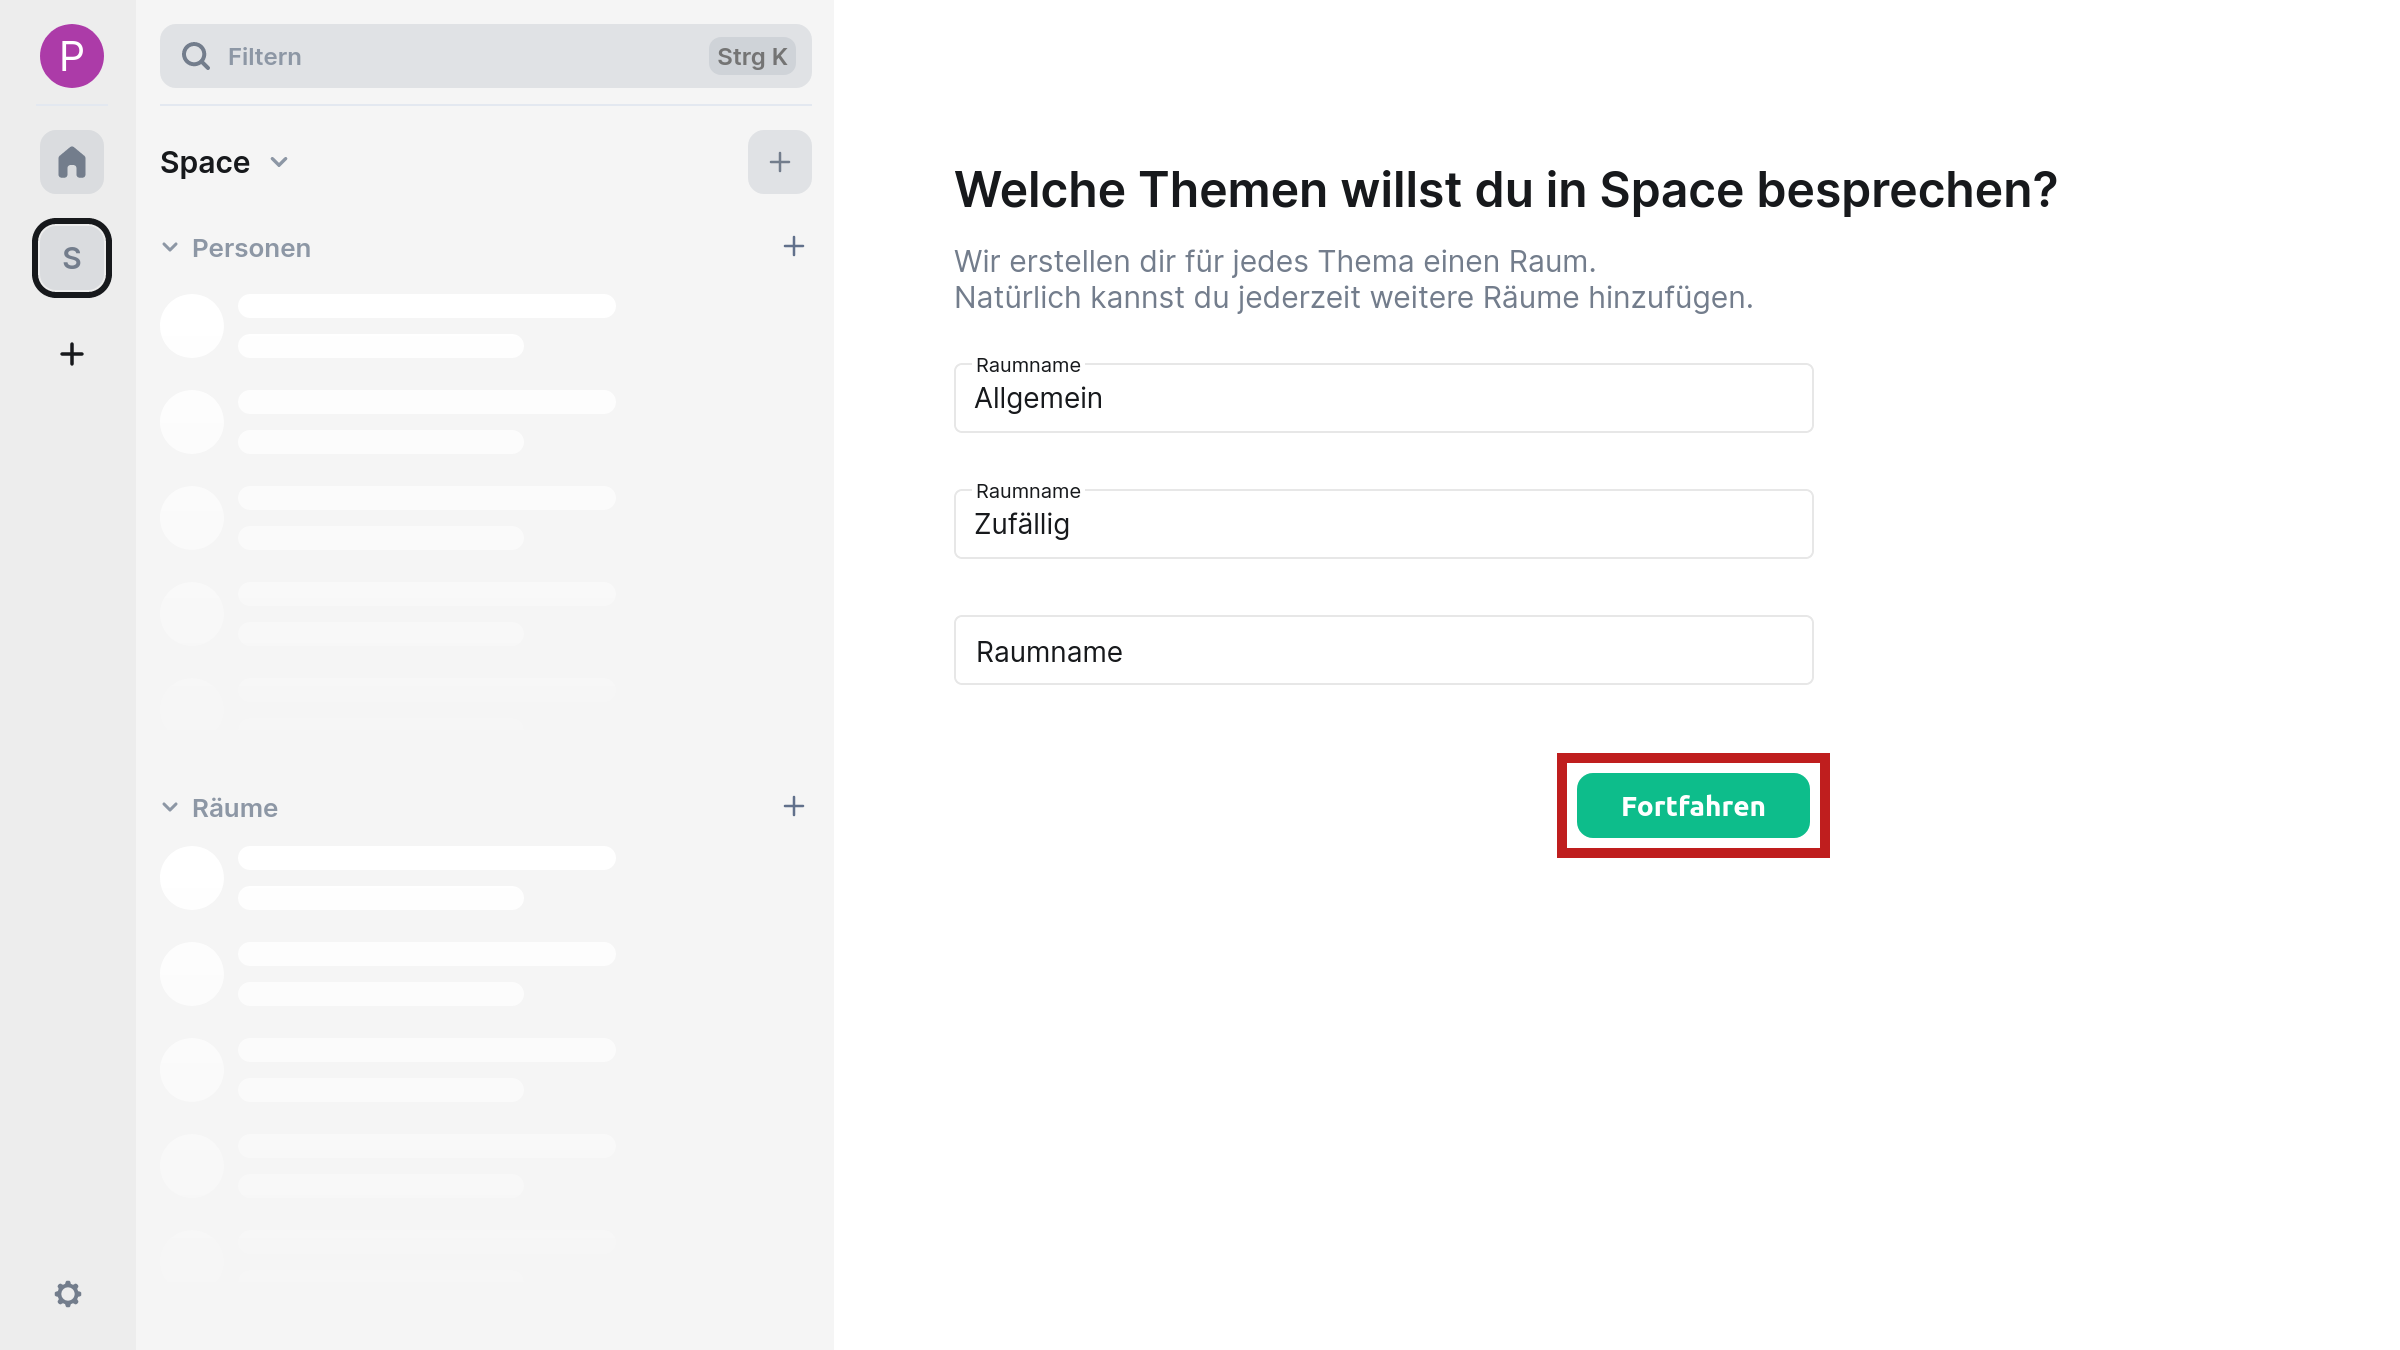
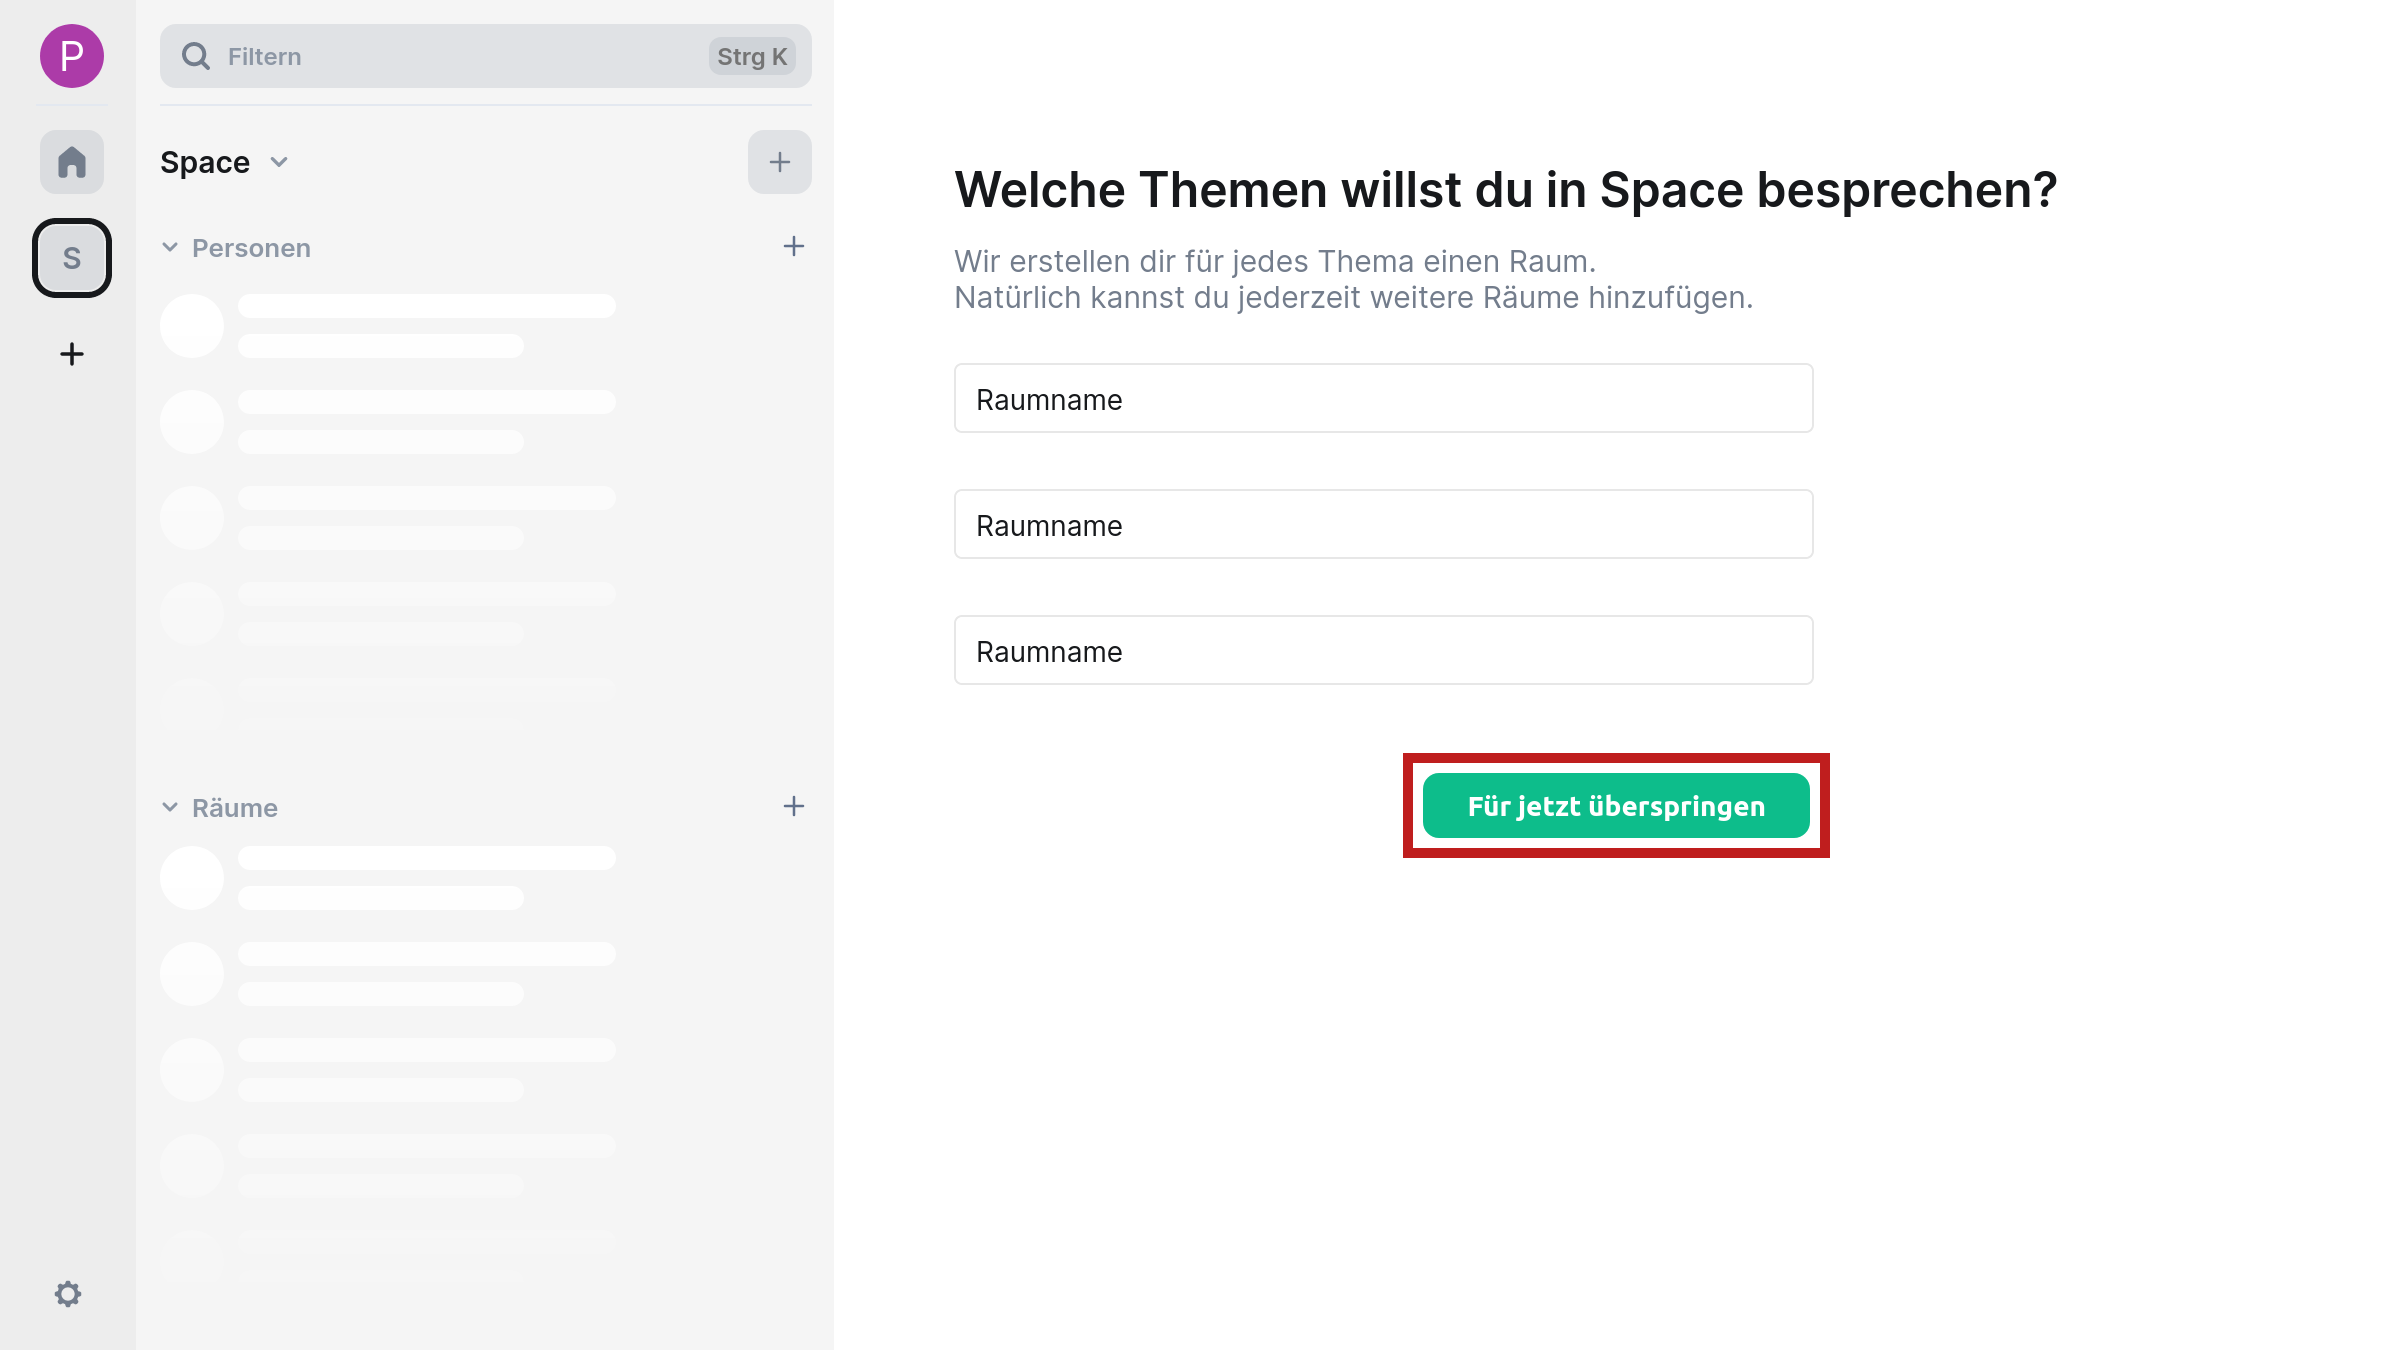
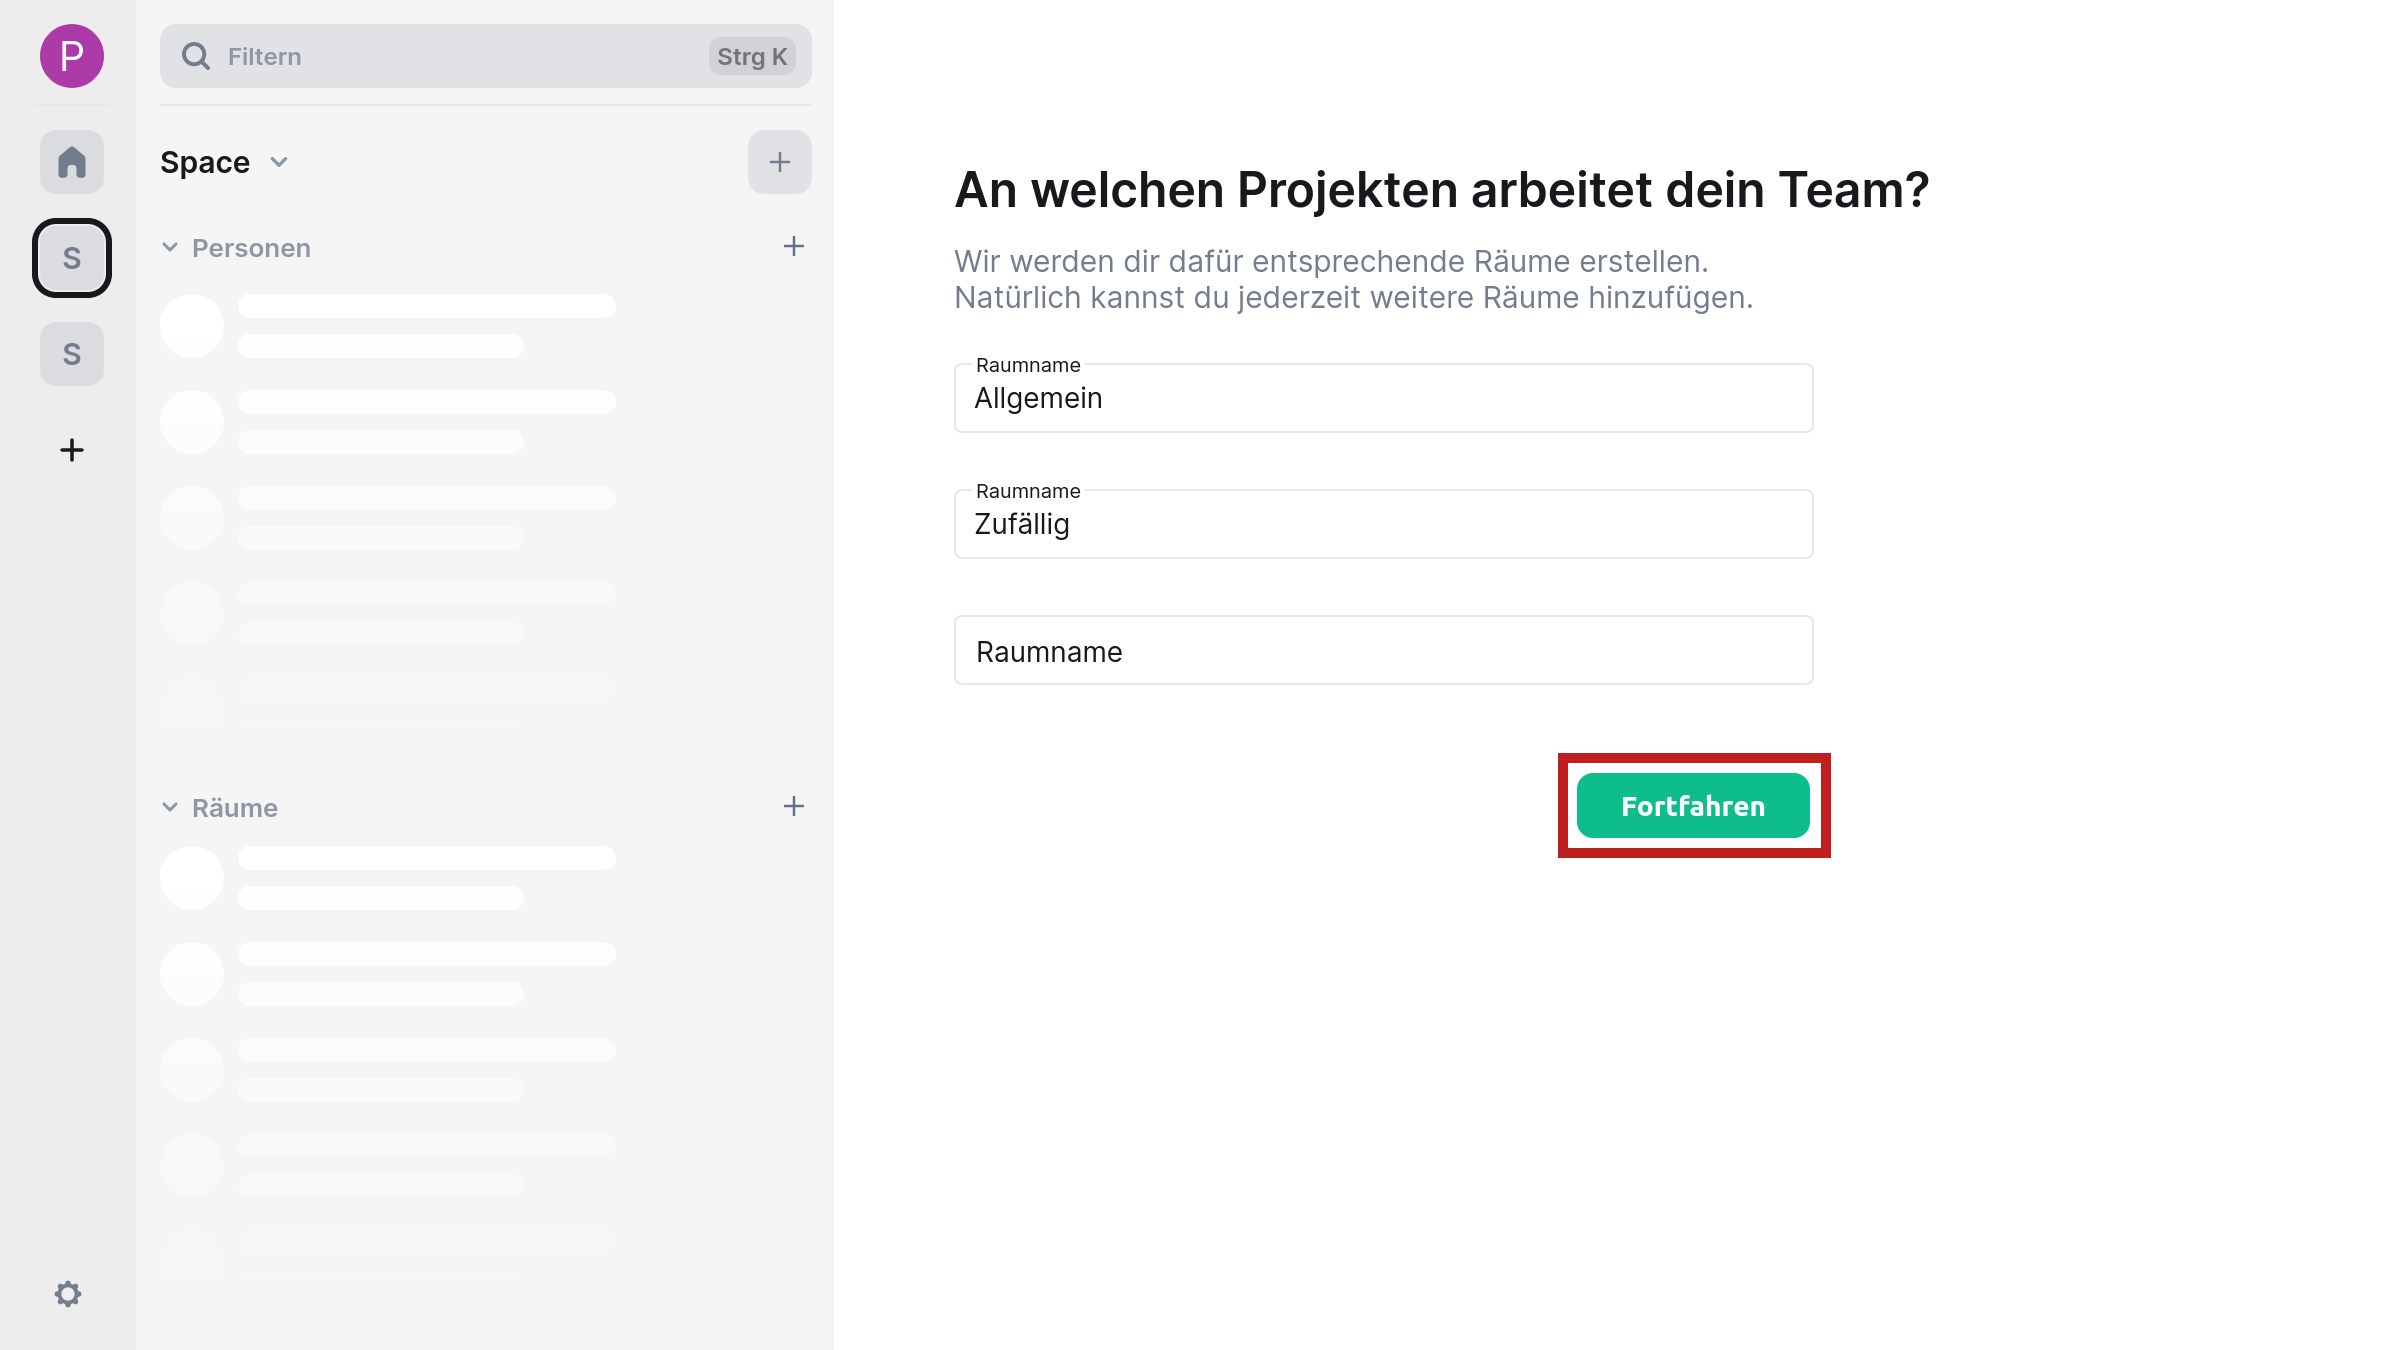
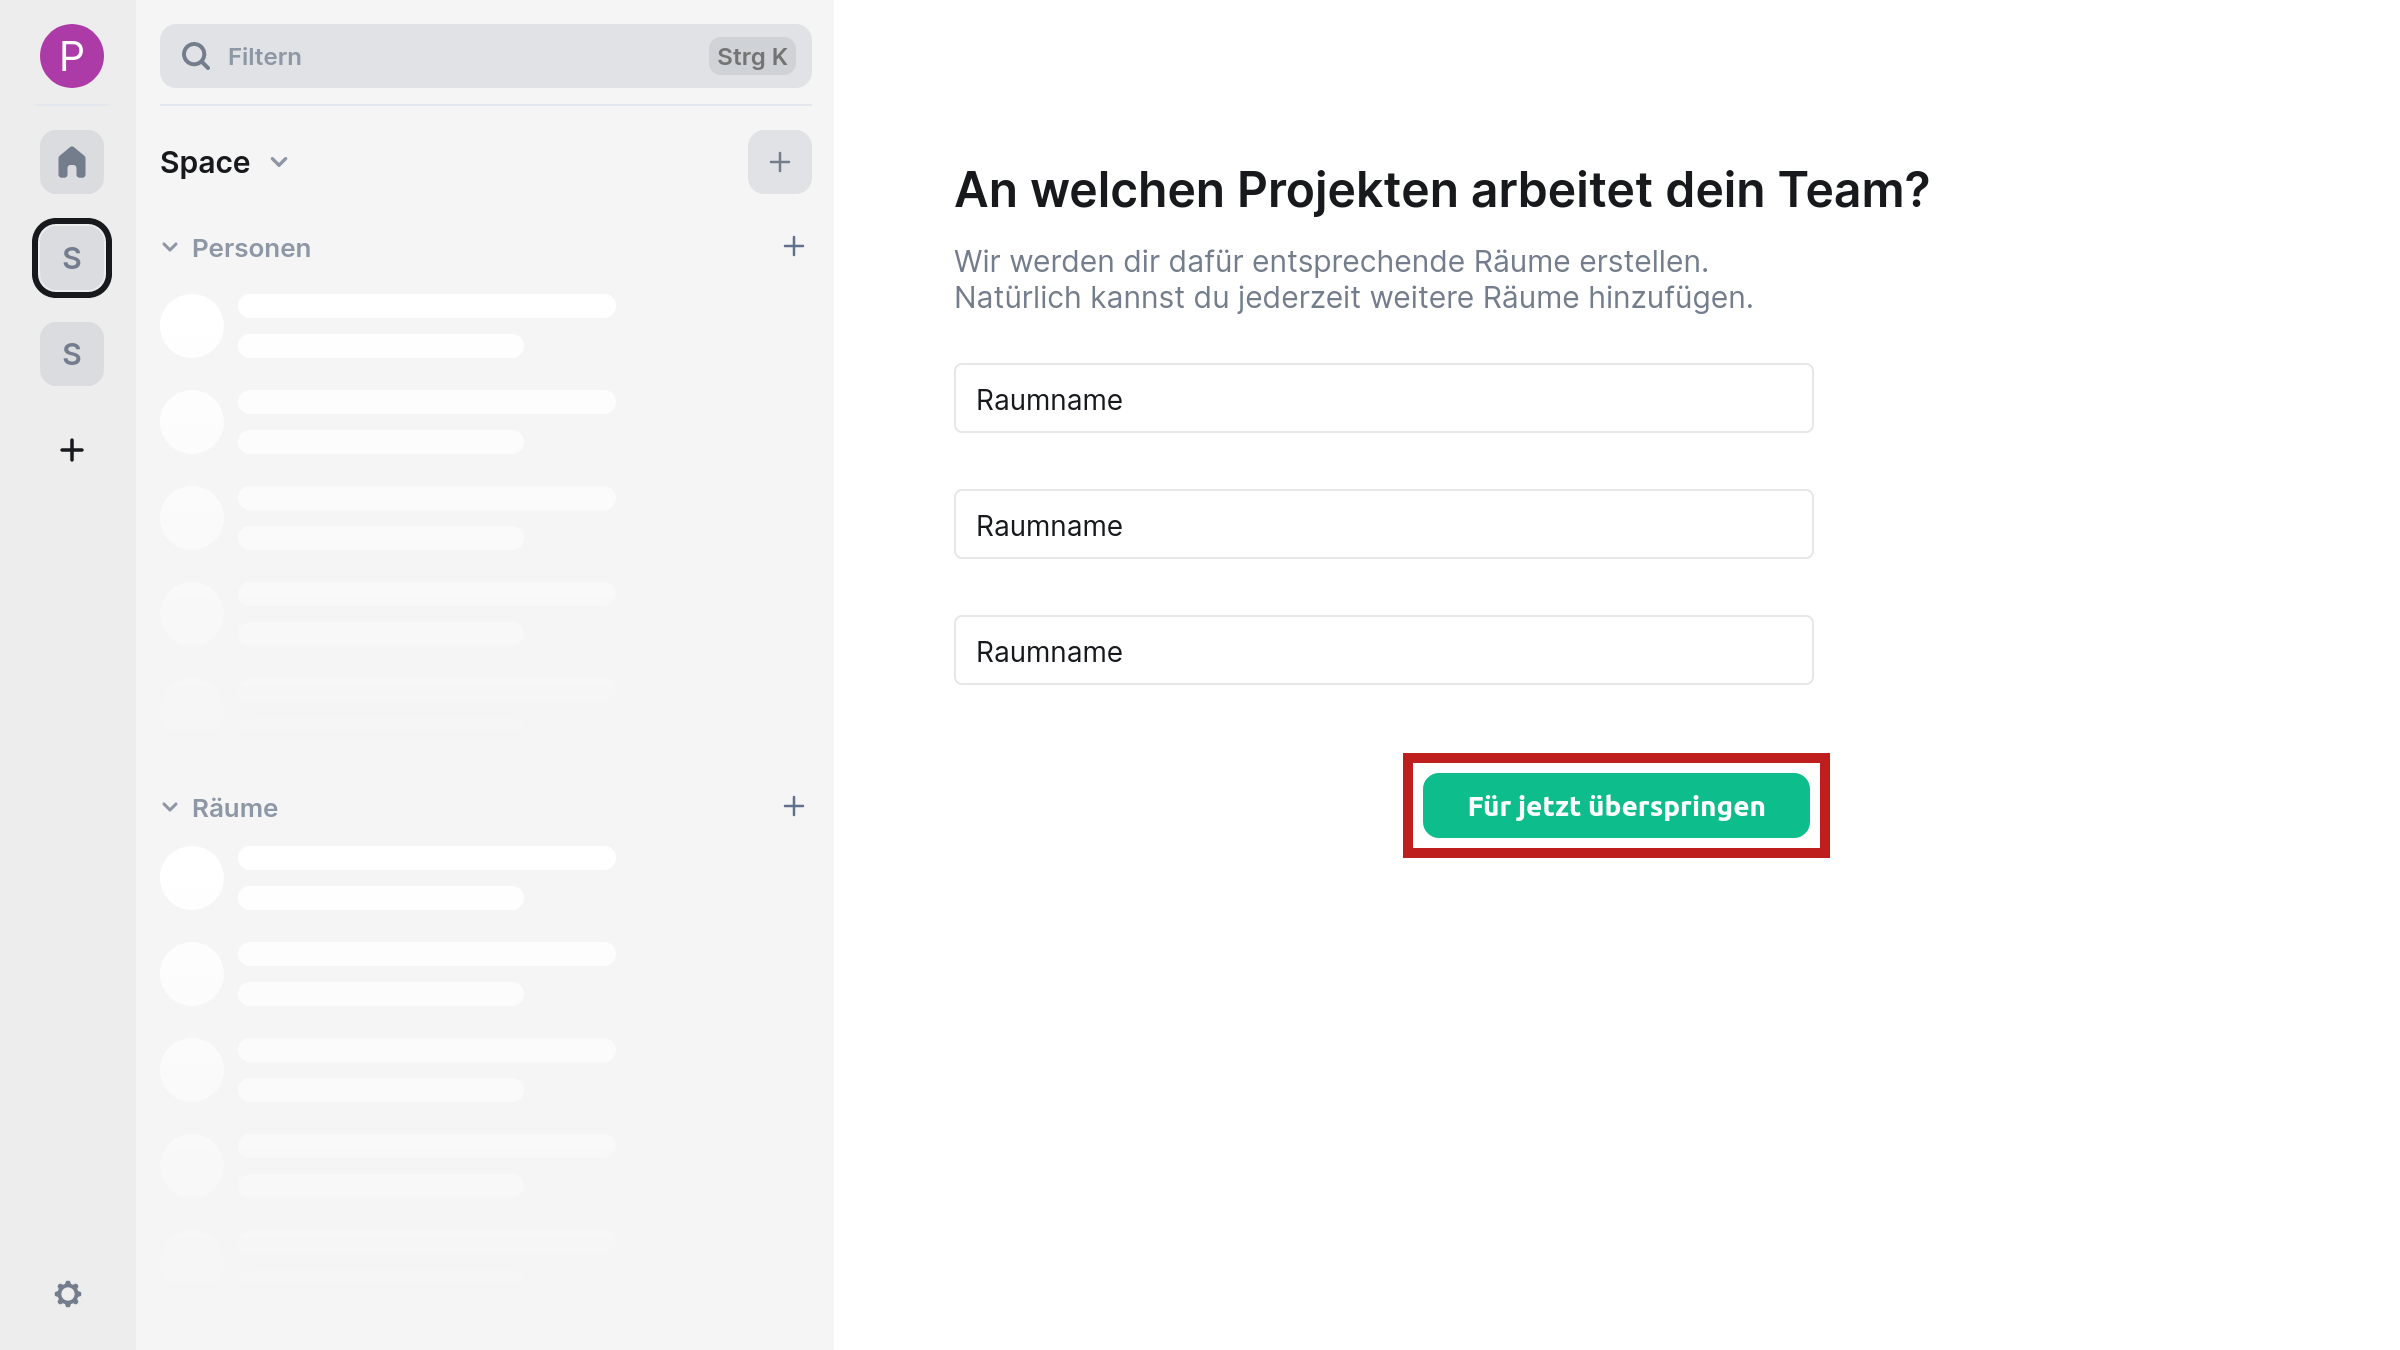
- The Space is now created. Element now suggests that you create rooms within the Space. You can adjust the suggested room names in the respective text field. If you want to create the rooms, click the “Continue” button. If you want to skip this step, empty all room names from the text fields, whereupon the “Continue” button changes to “Skip for now”. Confirm it.
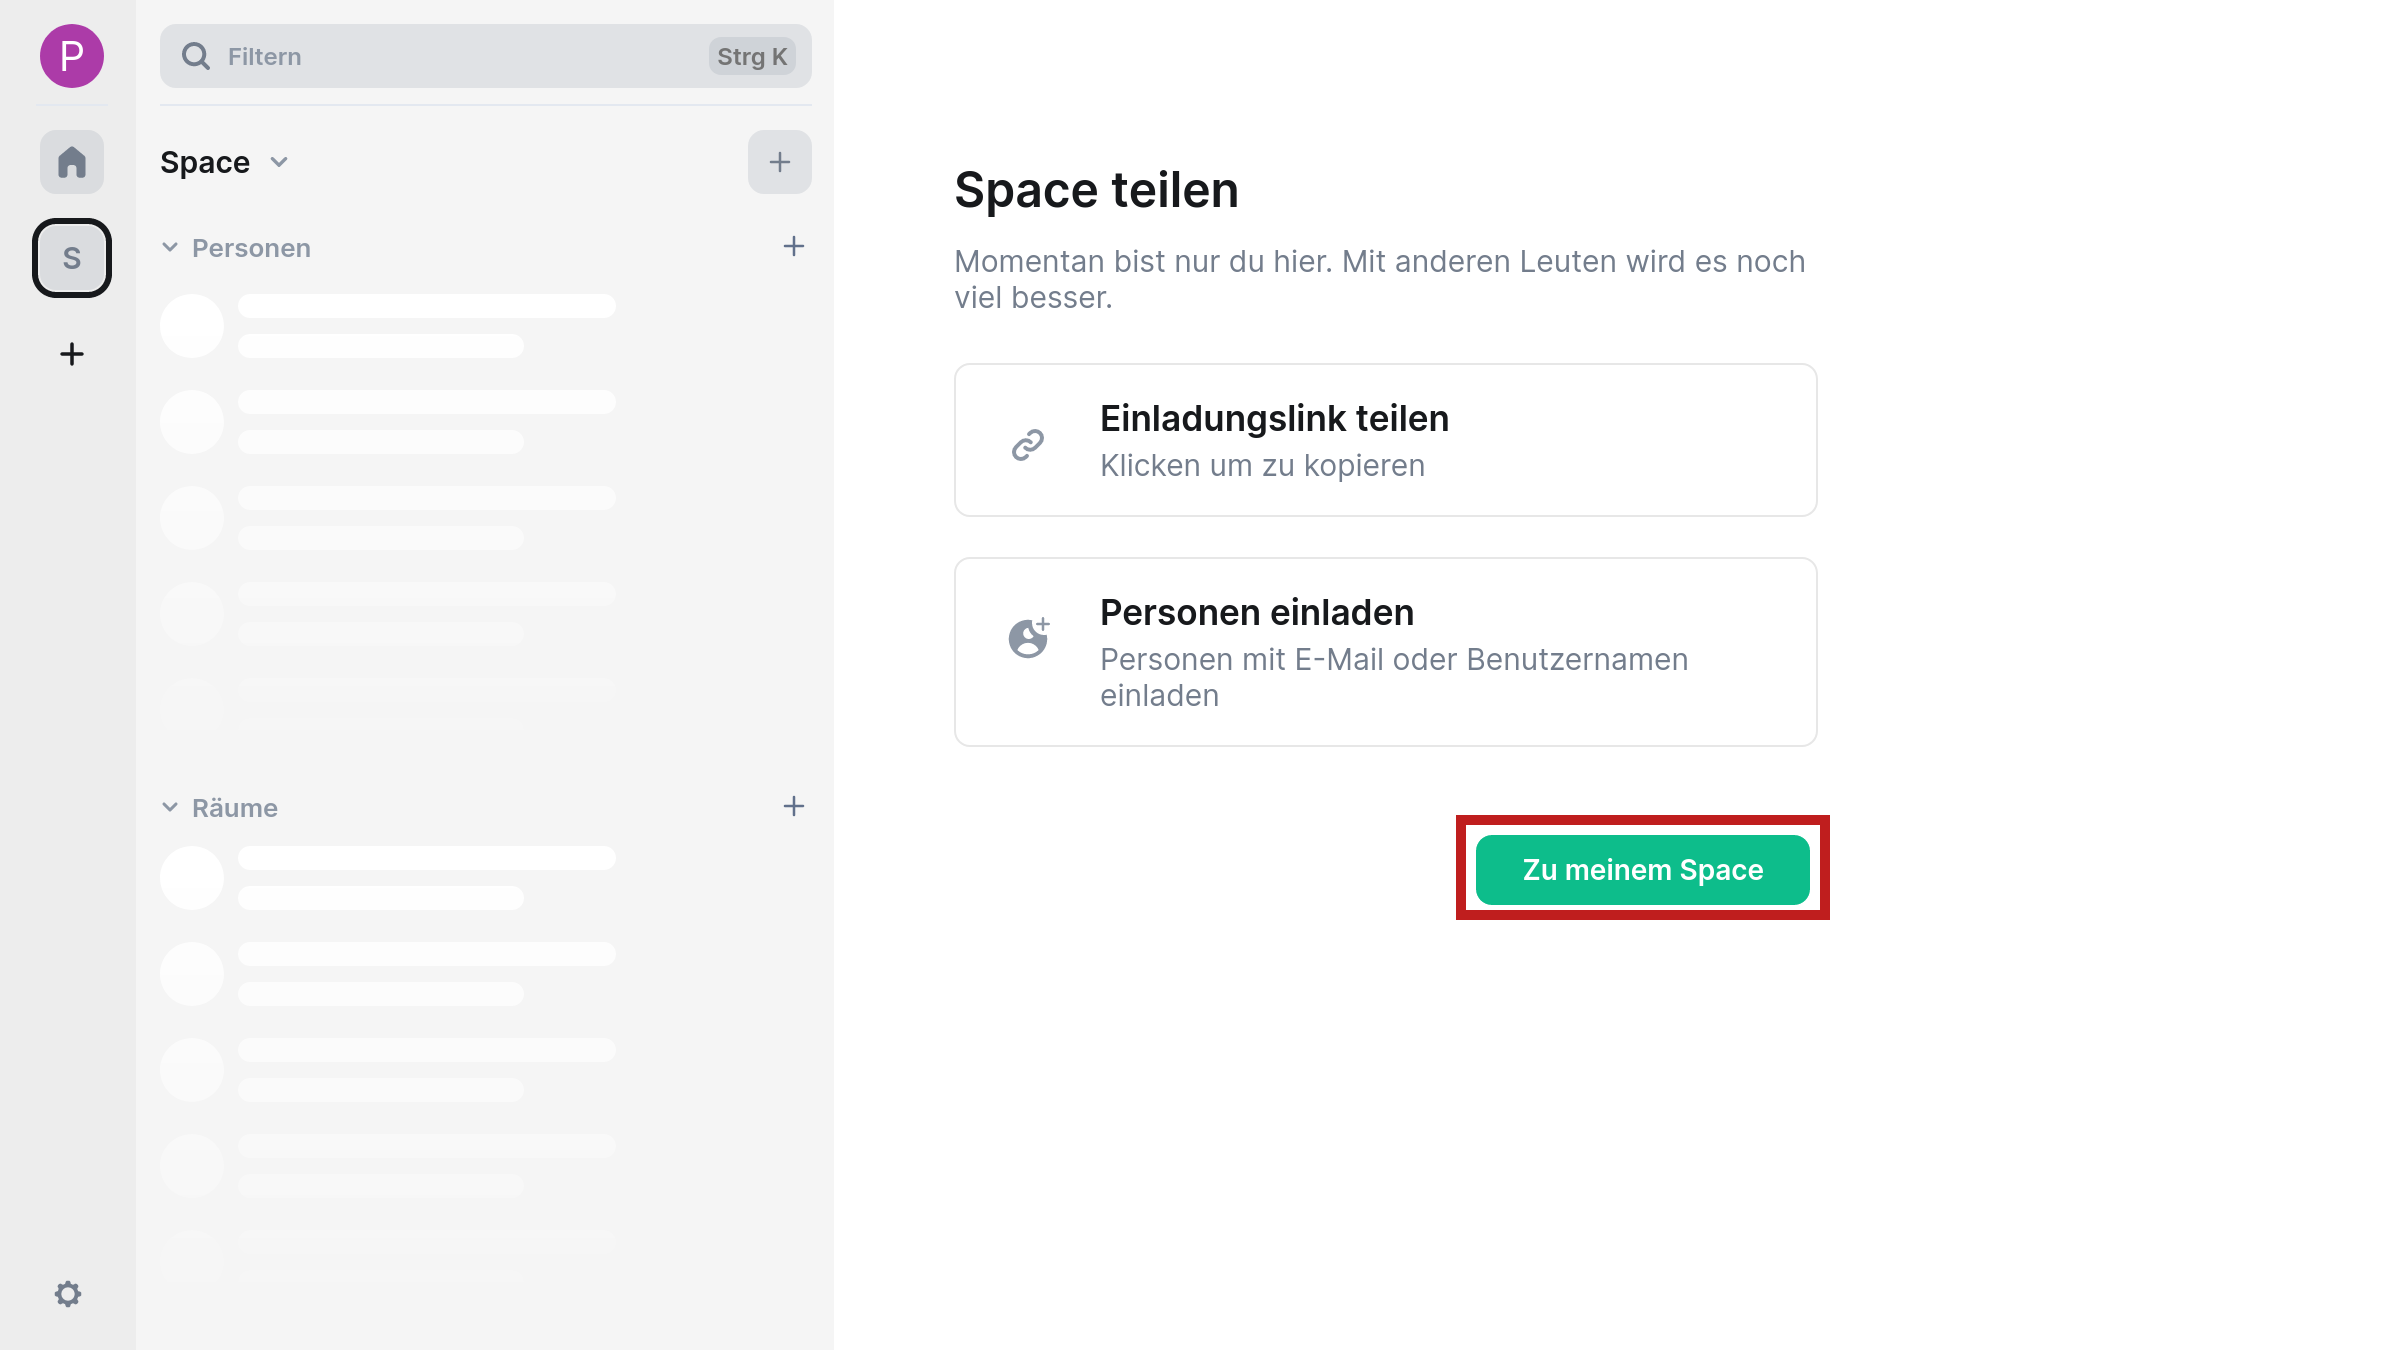
- Now Element suggests you to add people to the Space and offers you two buttons to “Share invitation link” and “Invite people”. Press the “Add to my Space” button to get to the Space overview.
Private Space
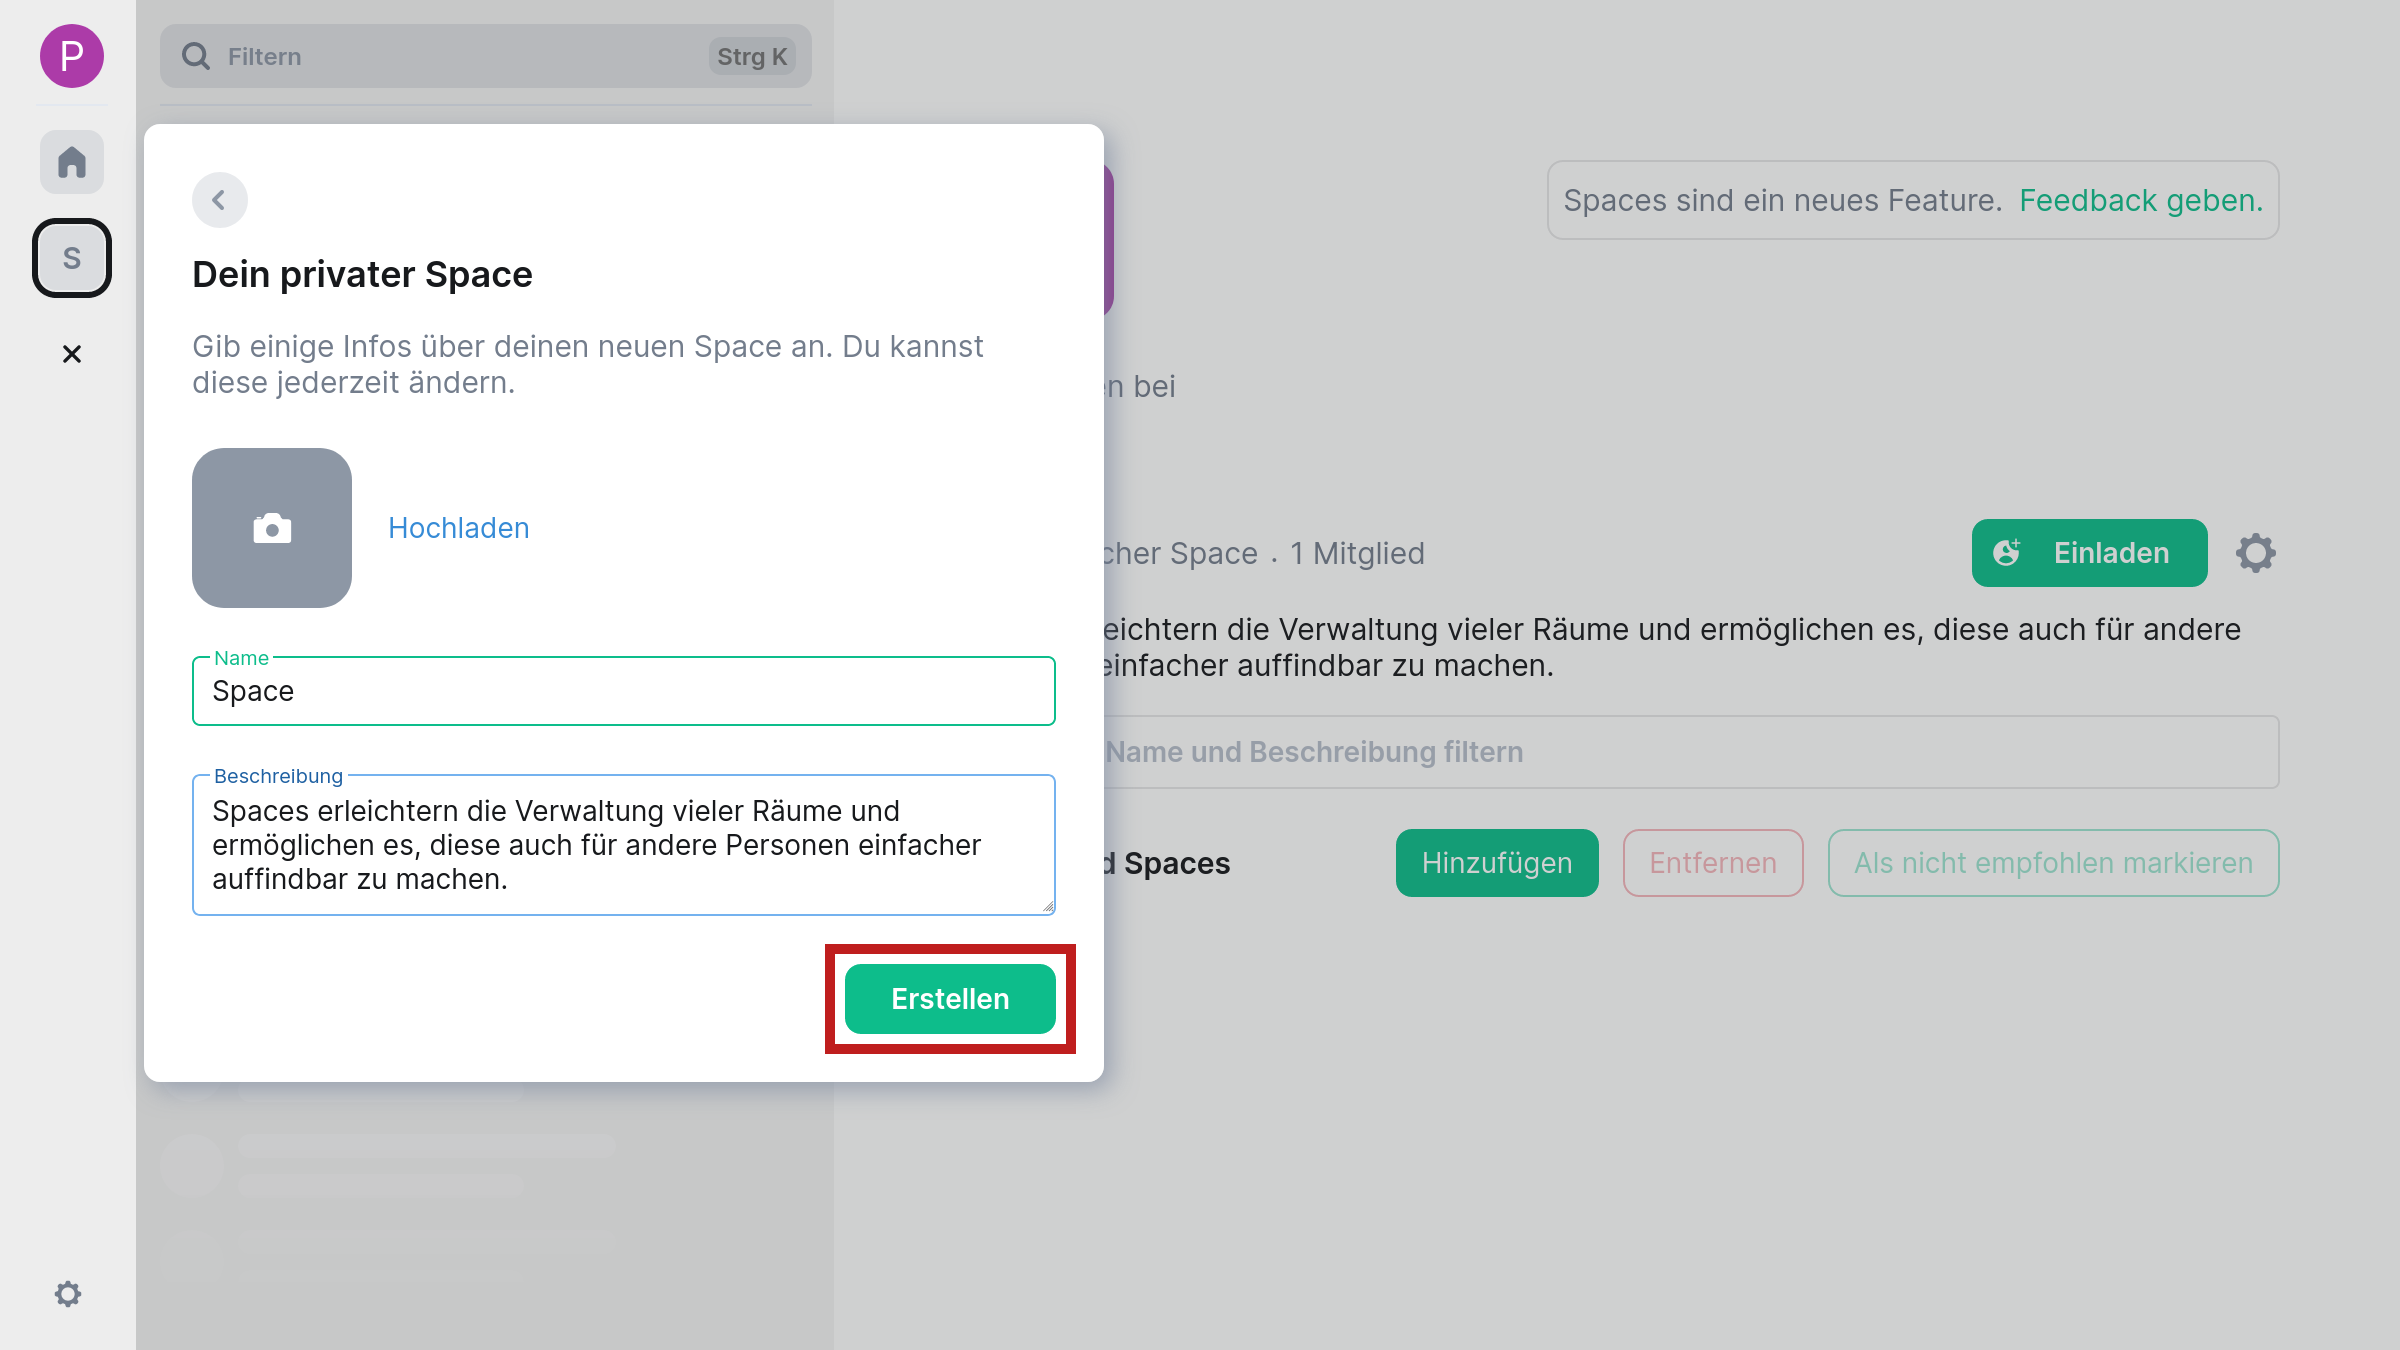
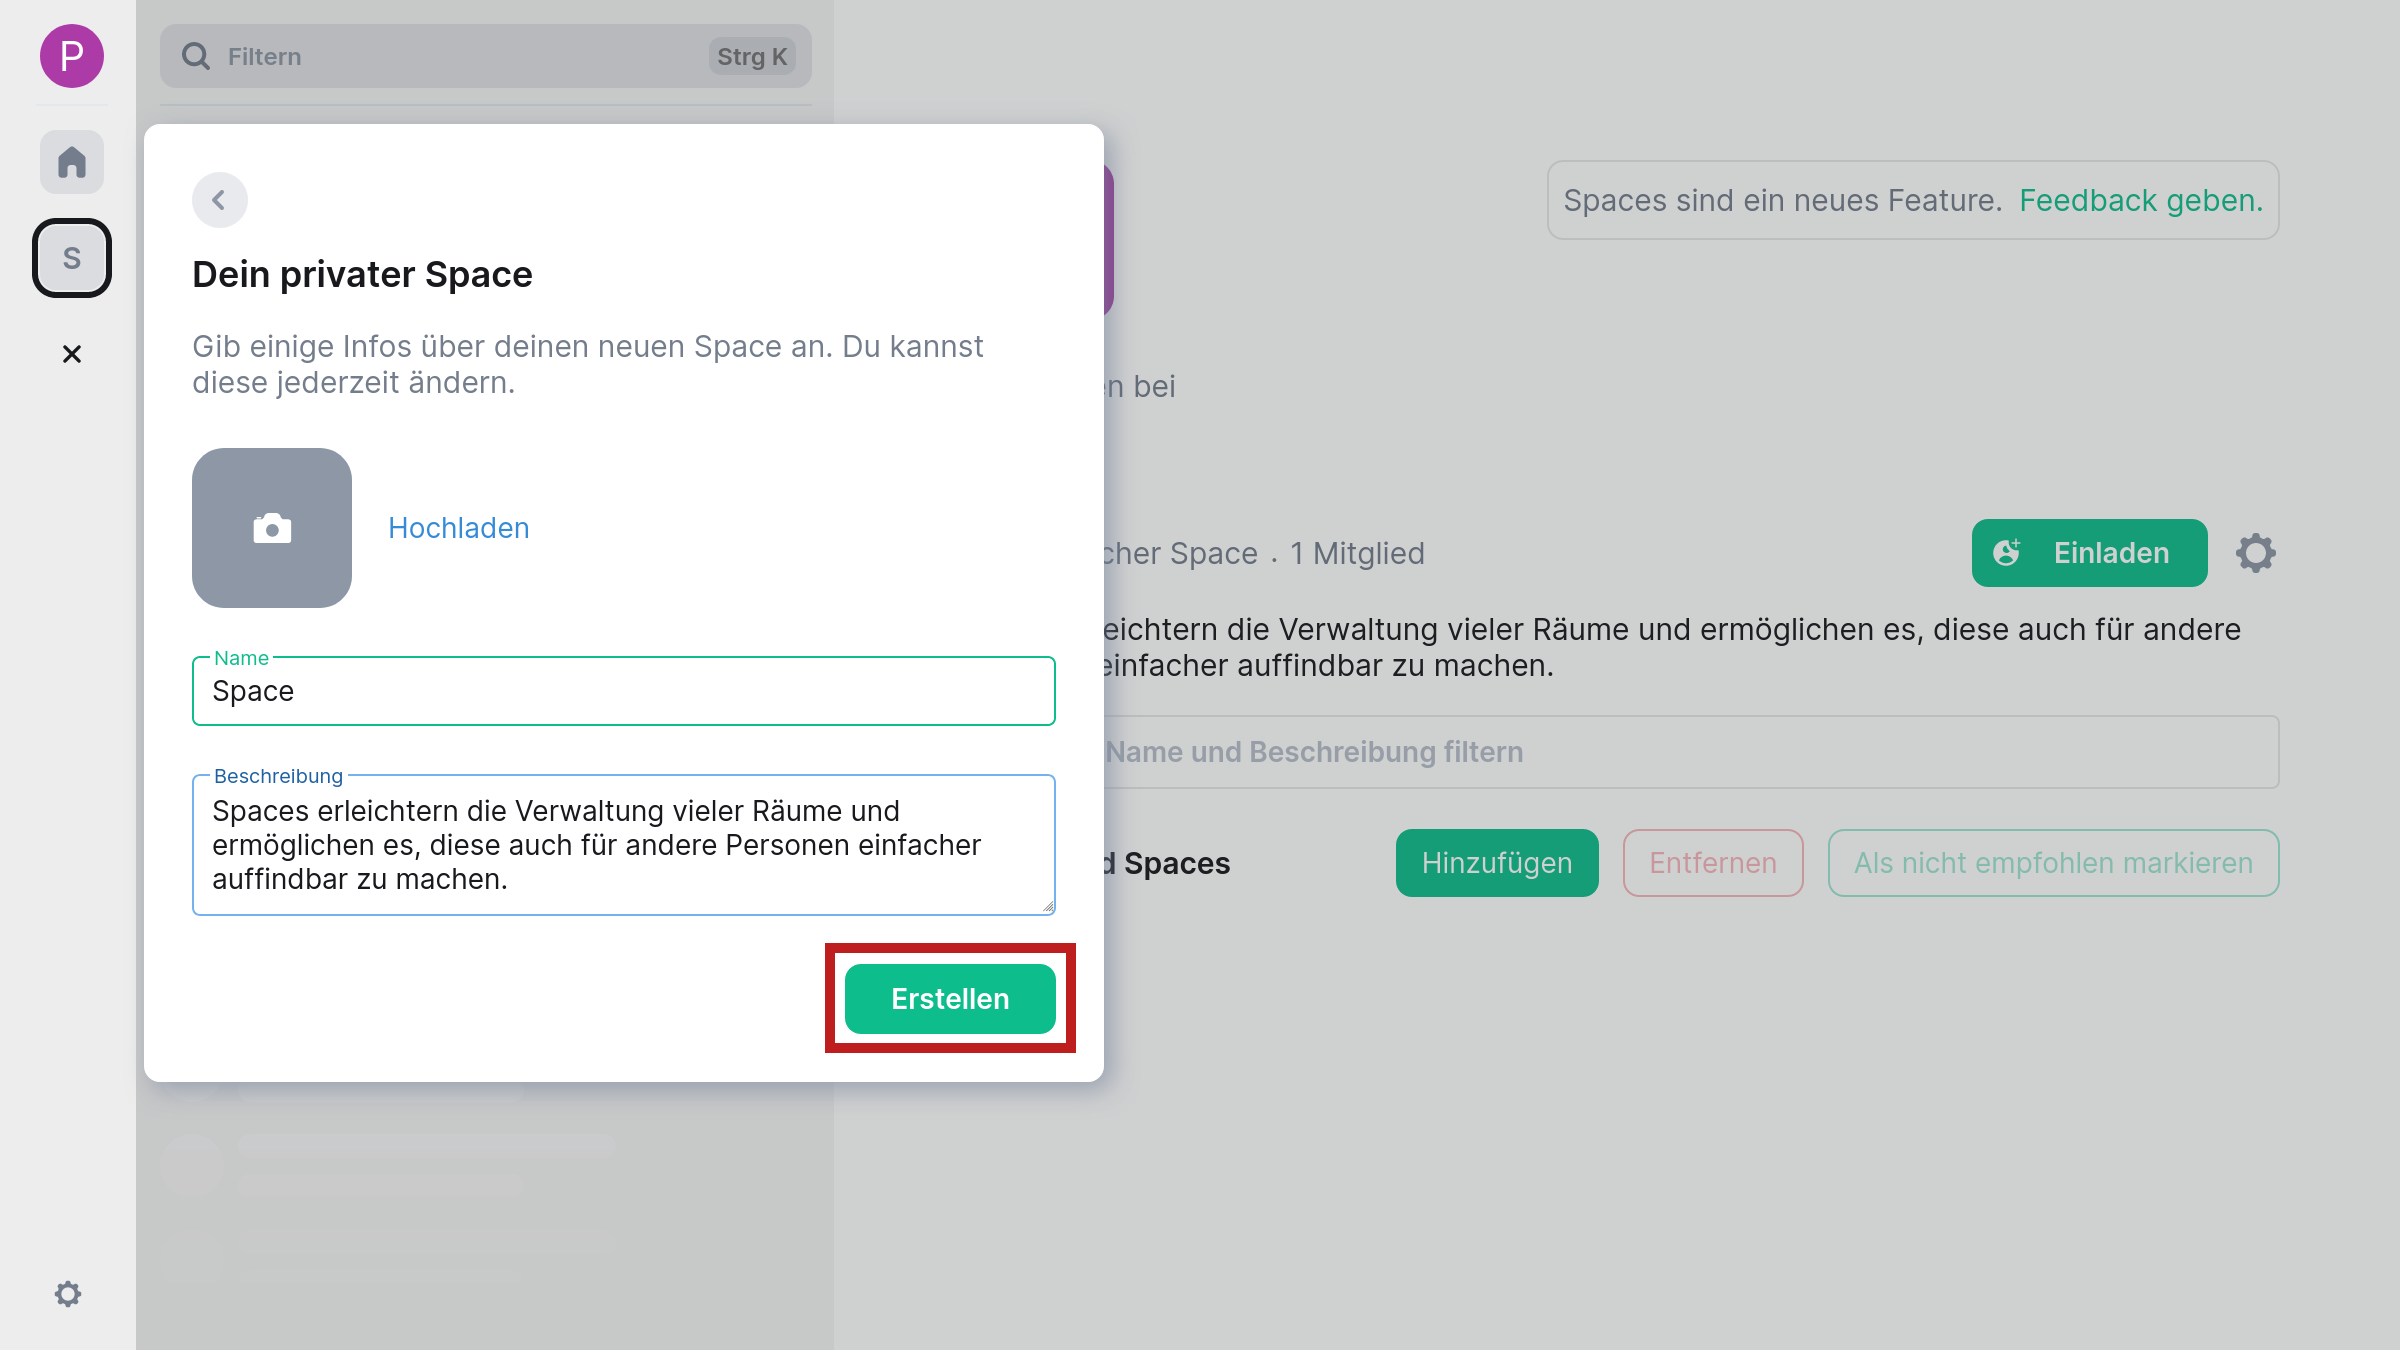
- The “Your private space” dialog opens. Here you can upload a photo by clicking on the “Upload” link. The file manager of your operating system will open where you can select the appropriate file. Enter a name and a description in the fields of the same name. If everything is entered according to your wishes, “Create” the Space by selecting the button of the same name.
- Element now asks you whether you want to create a personal (button “Only for me”) or private (button “For me and my colleagues”) Space. Select “For me and my colleagues” here.
- The Space is now created. Element now suggests that you create rooms within the Space. You can adjust the suggested room names in the respective text field. If you want to create the rooms, click the “Continue” button. If you want to skip this step, empty all room names from the text fields, whereupon the “Continue” button changes to “Skip for now”. Confirm it.
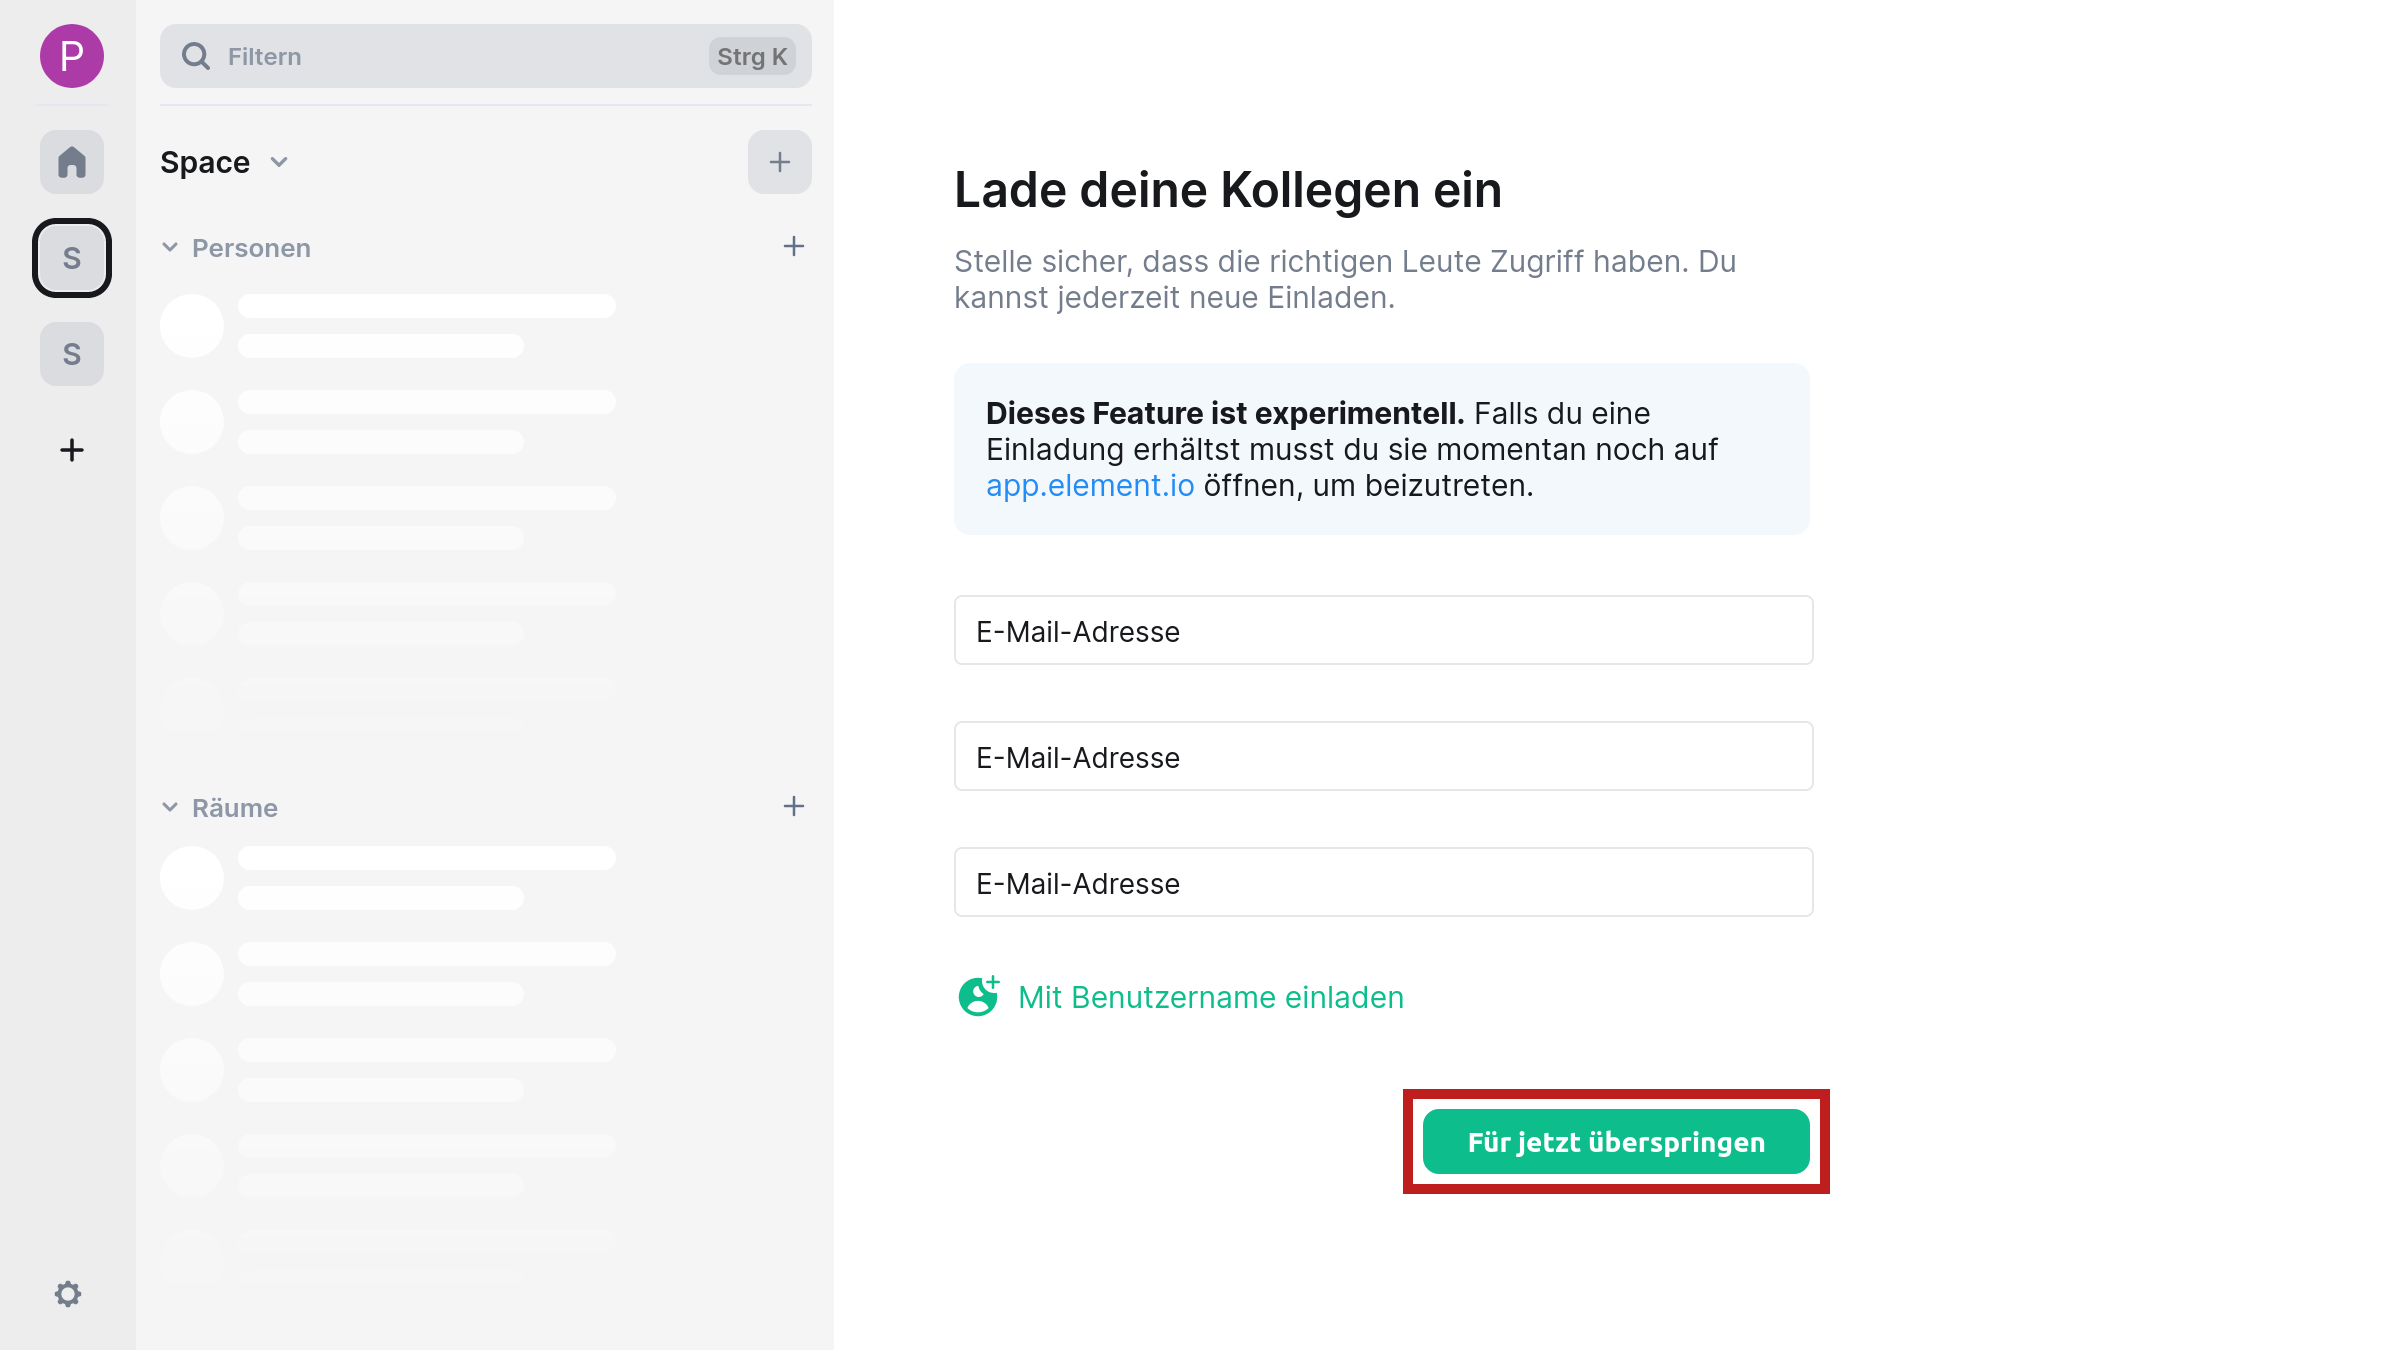
- Now Element will suggest you to invite people. To do this, enter the email addresses in the respective text fields and click the “Continue” button, or leave all entries blank and click the “Skip for now” button. You will now be taken to the Space overview.
Personal Space
- The “Your private space” dialog opens. Here you can upload a photo by clicking on the “Upload” link. The file manager of your operating system will open where you can select the appropriate file. Enter a name and a description in the fields of the same name. If everything is entered according to your wishes, “Create” the Space by selecting the button of the same name.
- Element now asks you whether you want to create a personal (button “Only for me”) or private (button “For me and my colleagues”) Space. Select “Only for me” here.

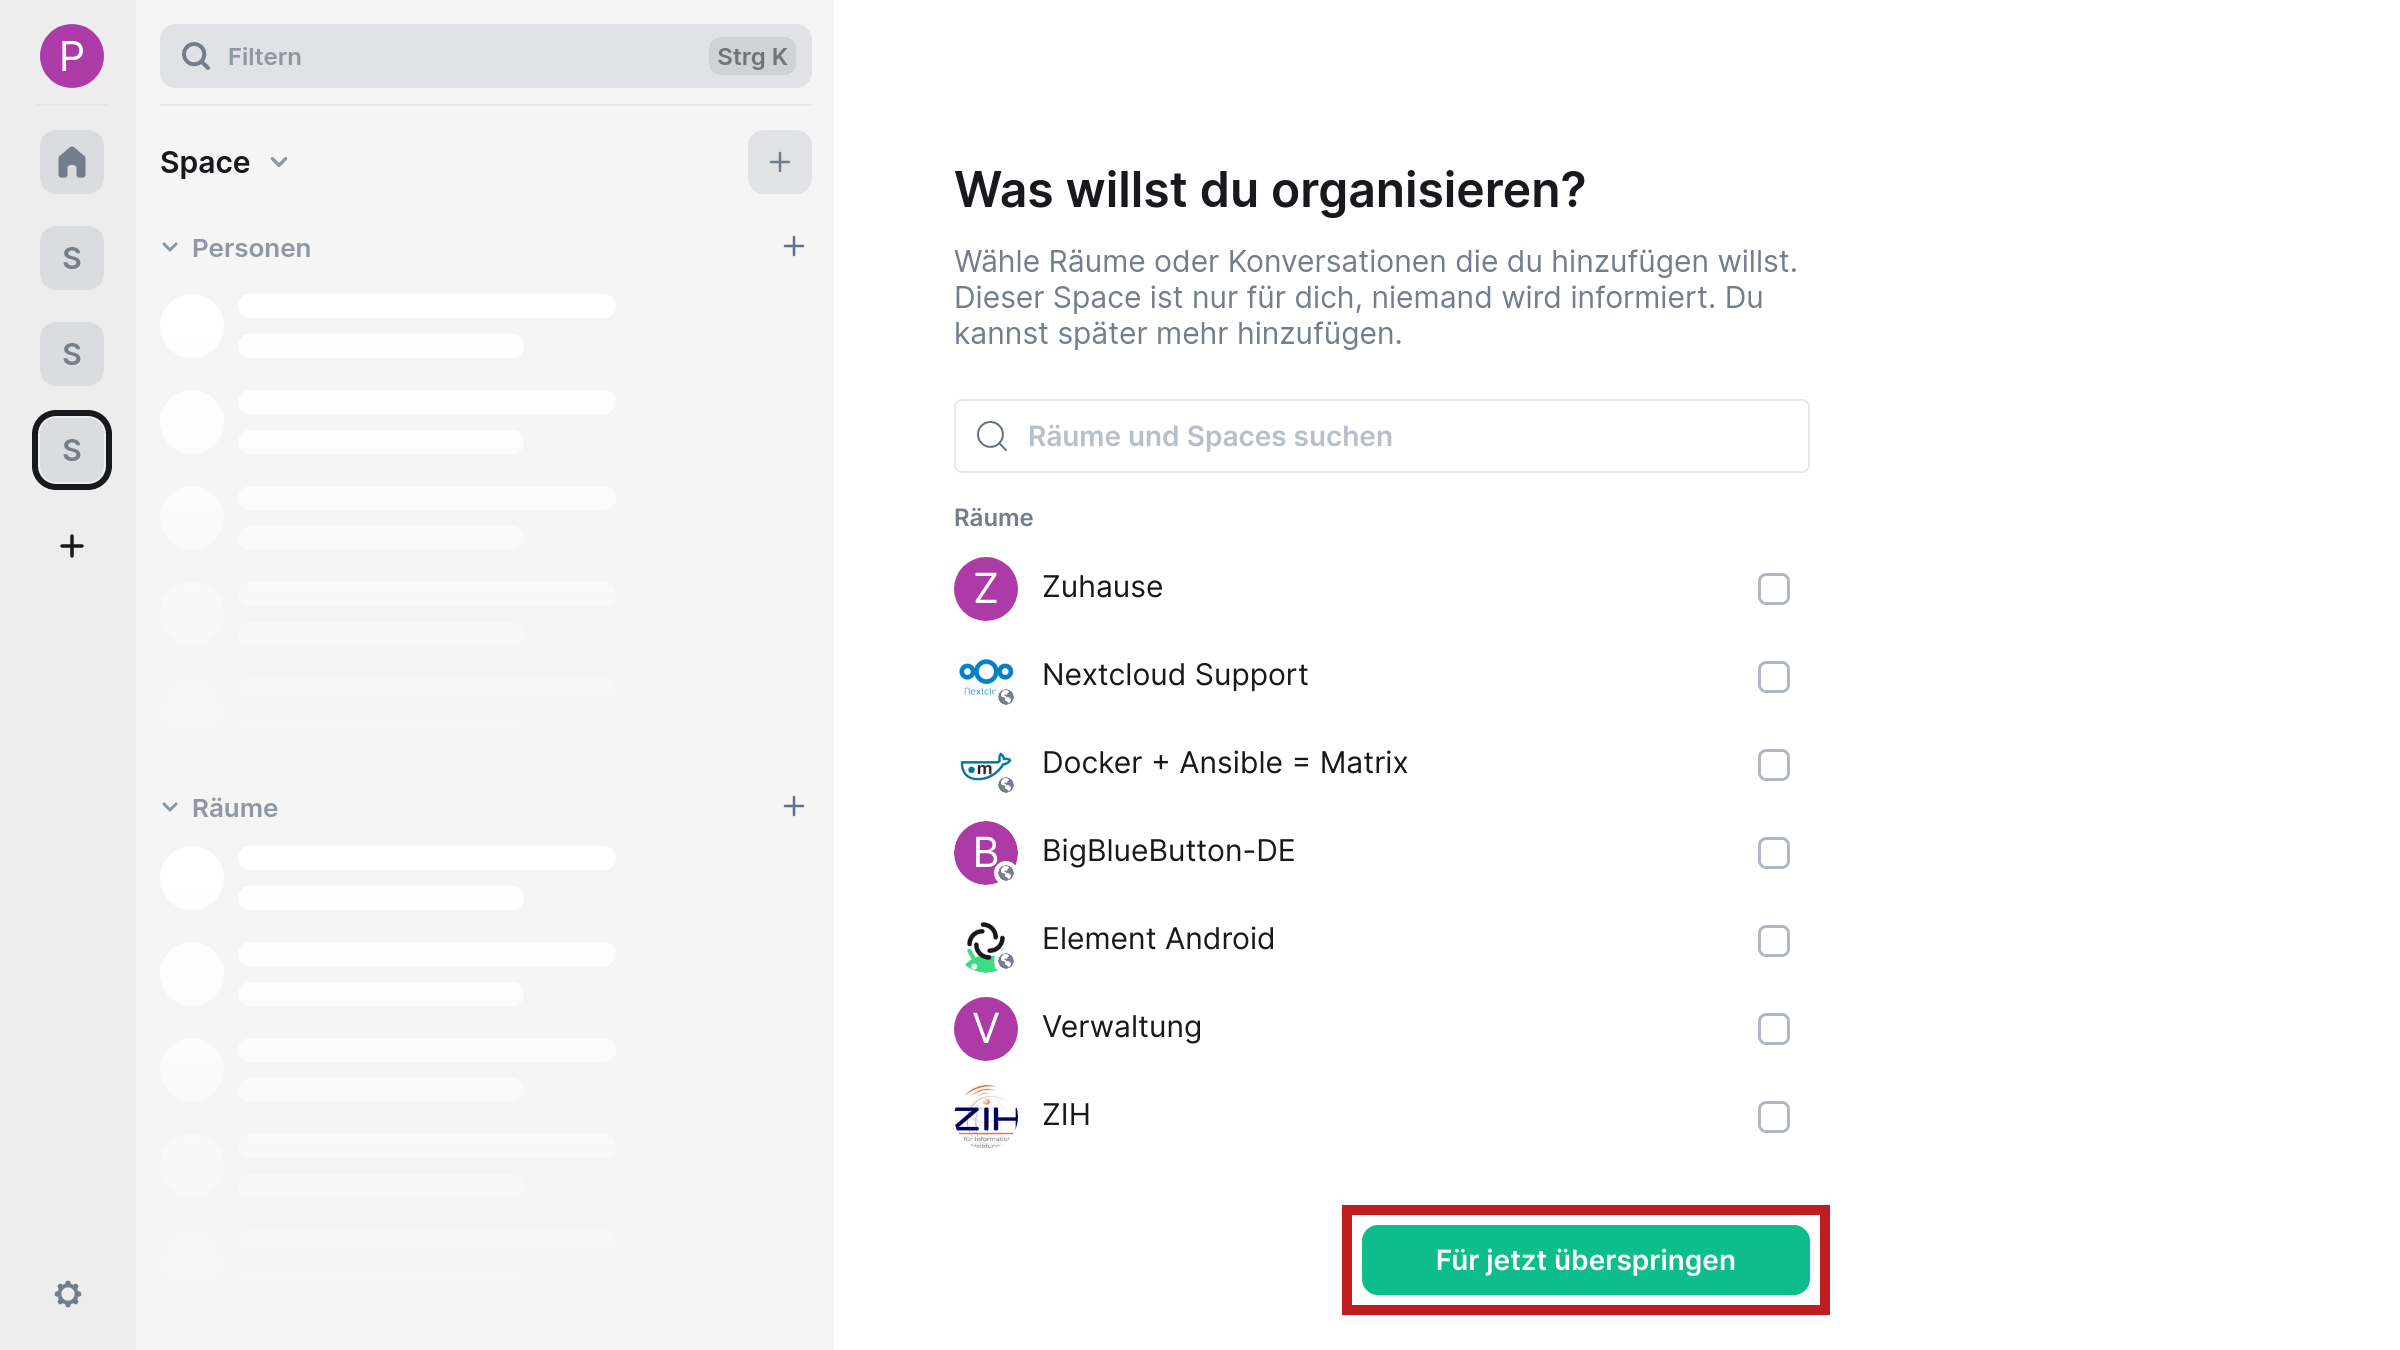
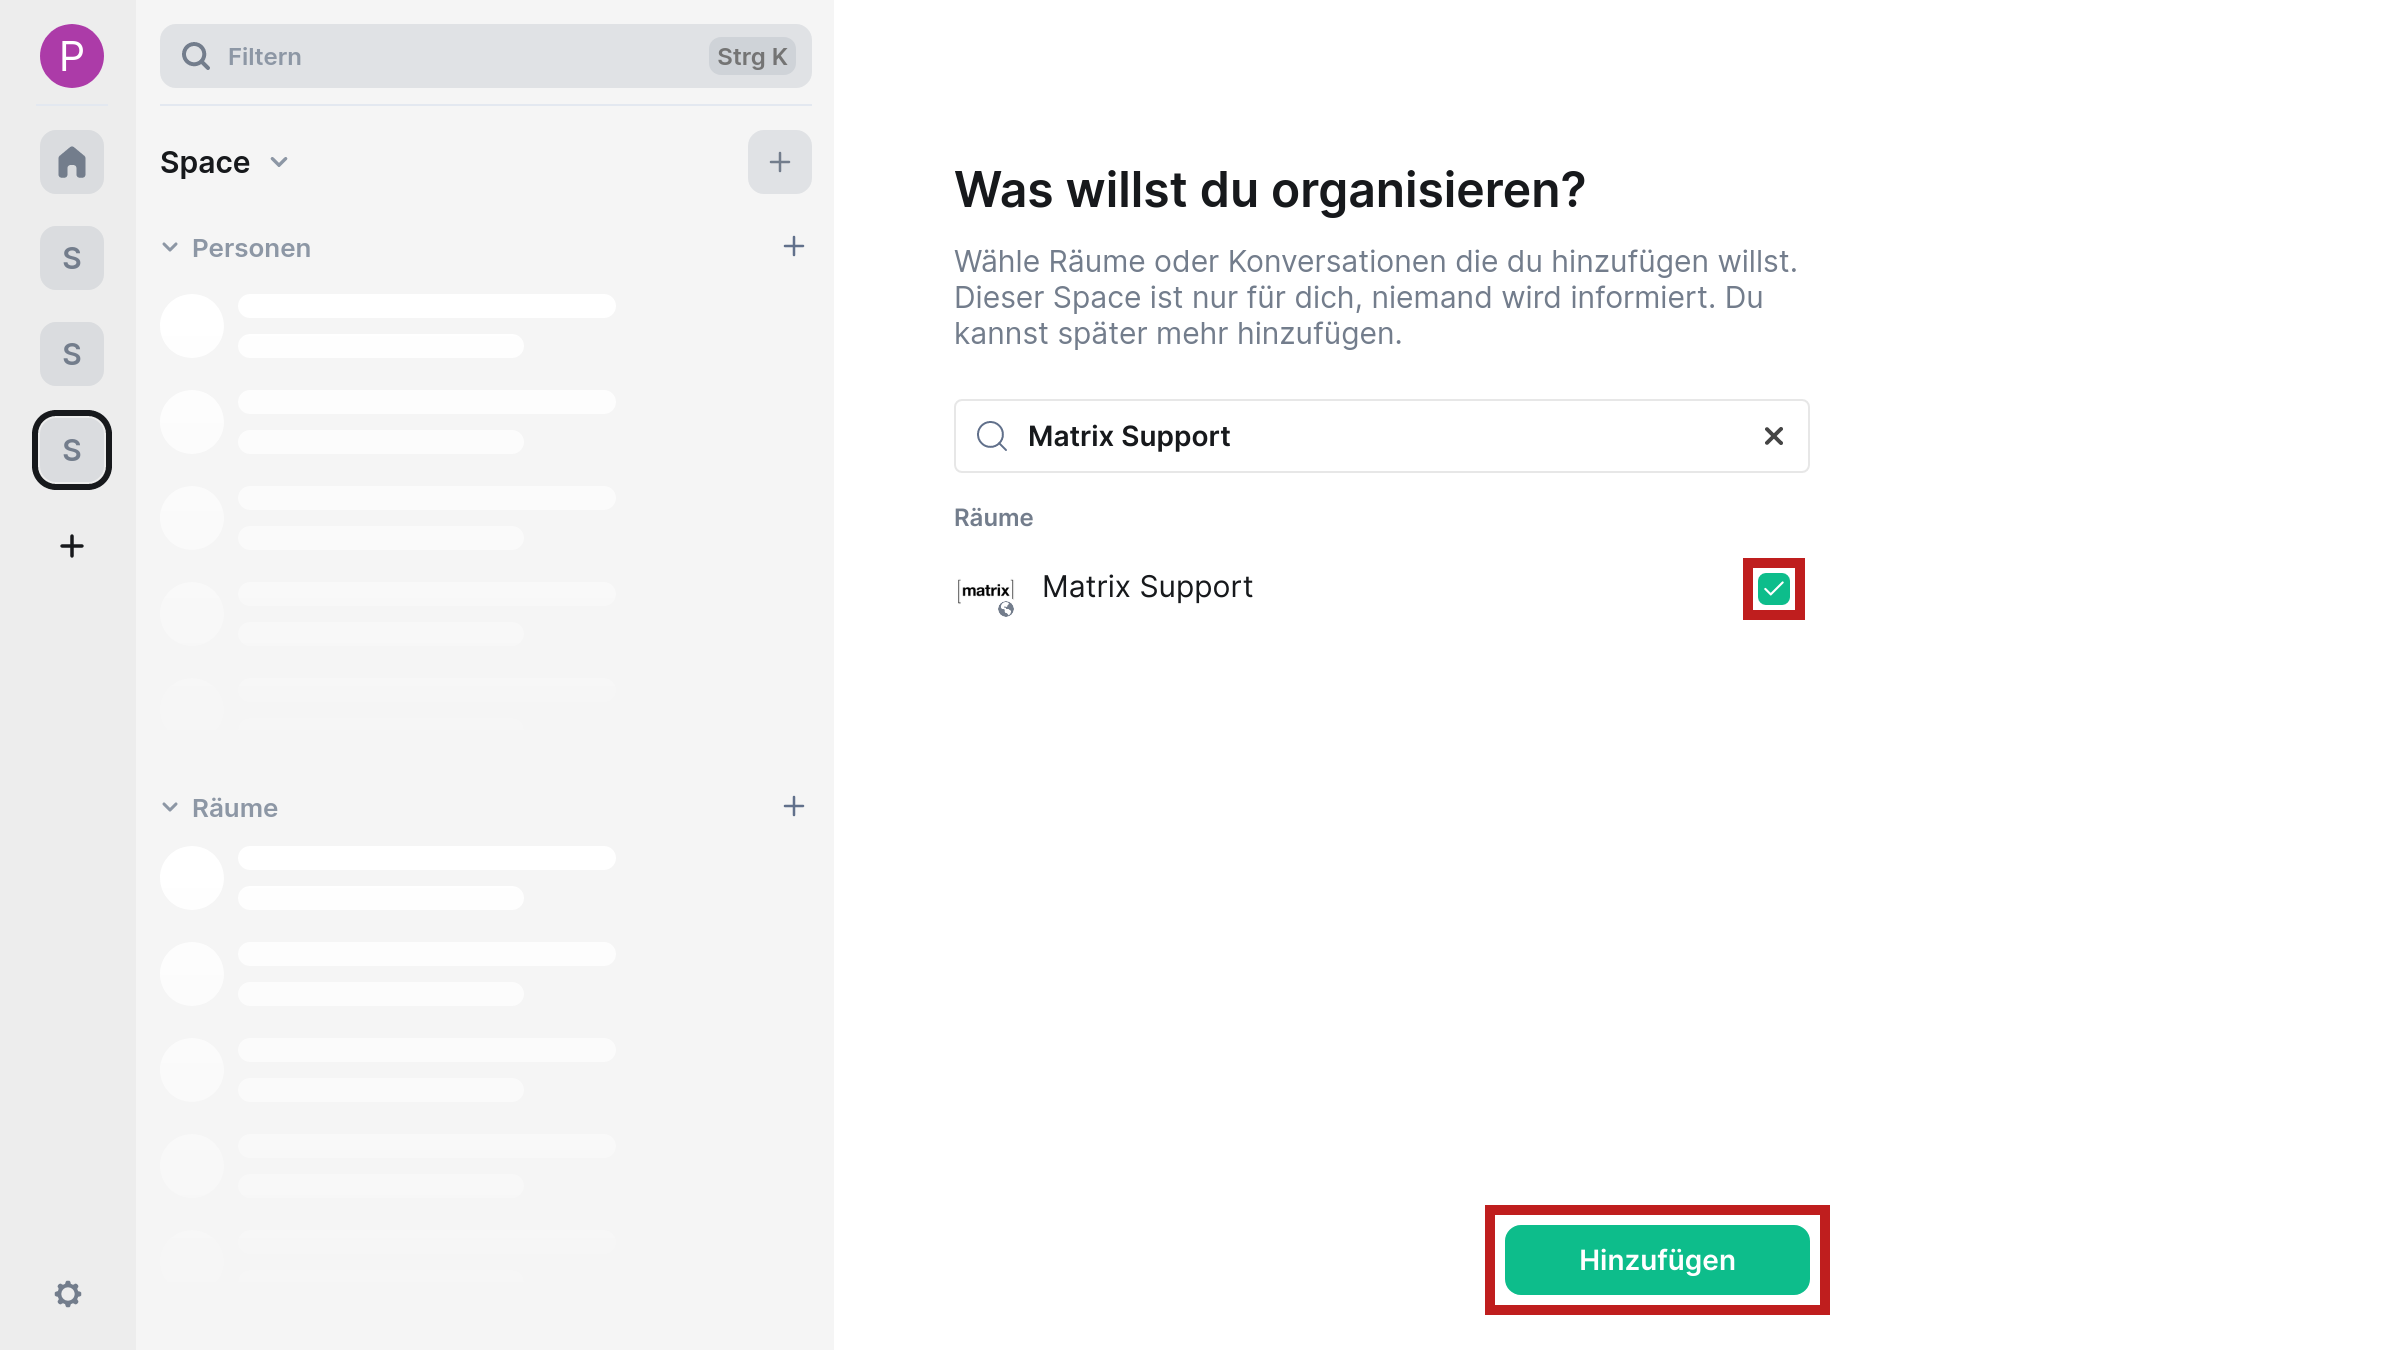
- Element now suggests adding rooms to the Space that you have already joined. For this purpose, a list with all rooms will be displayed below the search field. If necessary, filter the list using the search field and activate the respective check button of the room to accept it for selection. Confirm the action with the help of the “Add” button. If you do not want to add a space, do not check any space and confirm the action with the “Skip for now” button. You will now be taken to the Space overview.