Create rooms and take responsibility
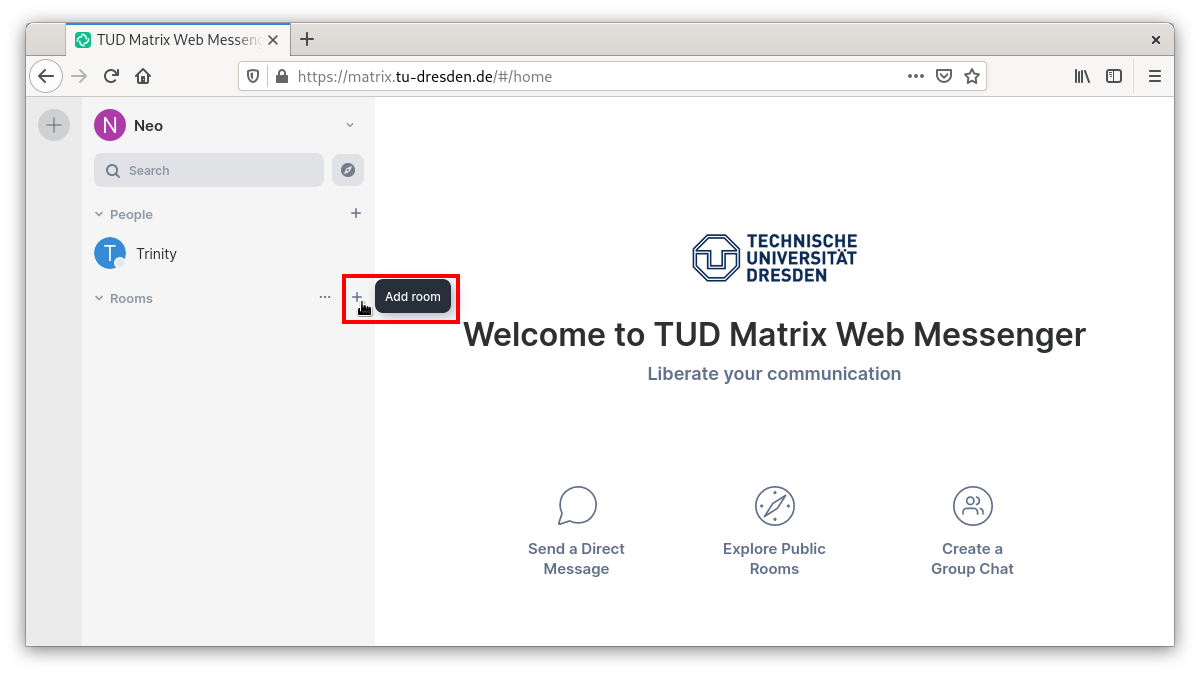
New rooms are created using the + in the left bar in the category Rooms.
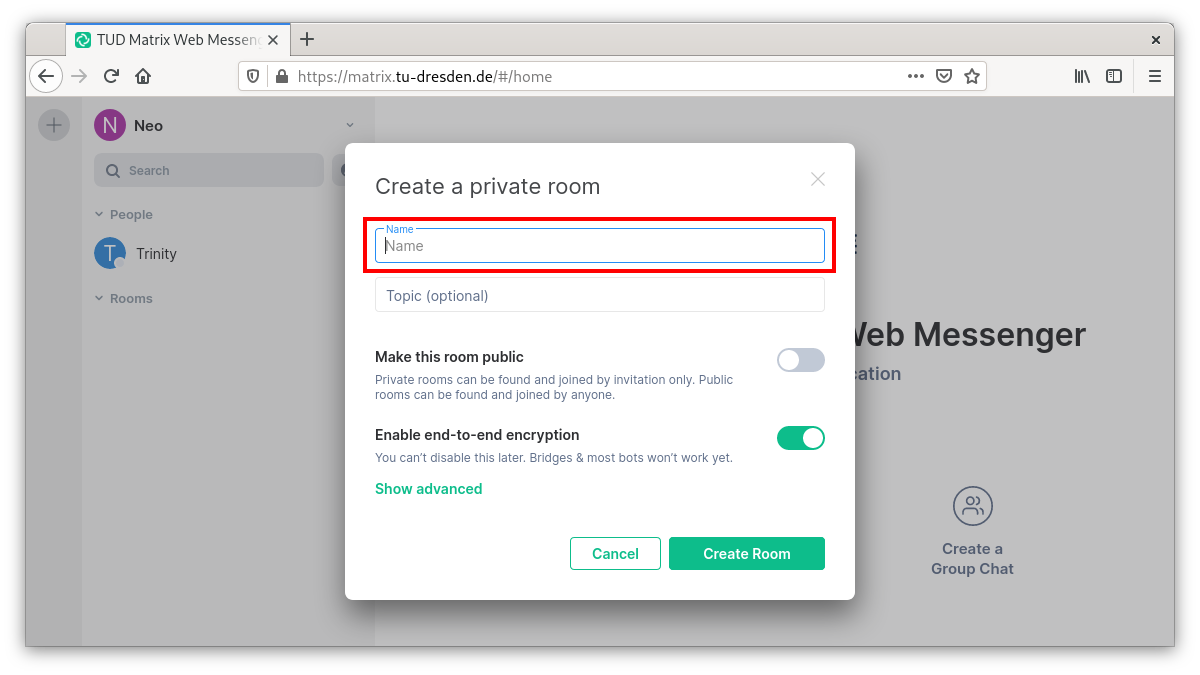
 Then the room name must be assigned. You can also optionally assign a theme (which can be adapted more often later). Optionally, the room can be made publicly accessible (this is not the default setting). With an additional click on “Show more settings” it can be prevented that Matrix users from outside the TU Dresden home server (Homeserver) can enter the room. By default, all new rooms (just like all new 1:1 calls) have end-to-end encryption set up. If this is not desired (e.g. because verification of the participants becomes very impractical in very large rooms) you can use the slider before creating the room to not activate end-to-end encryption.
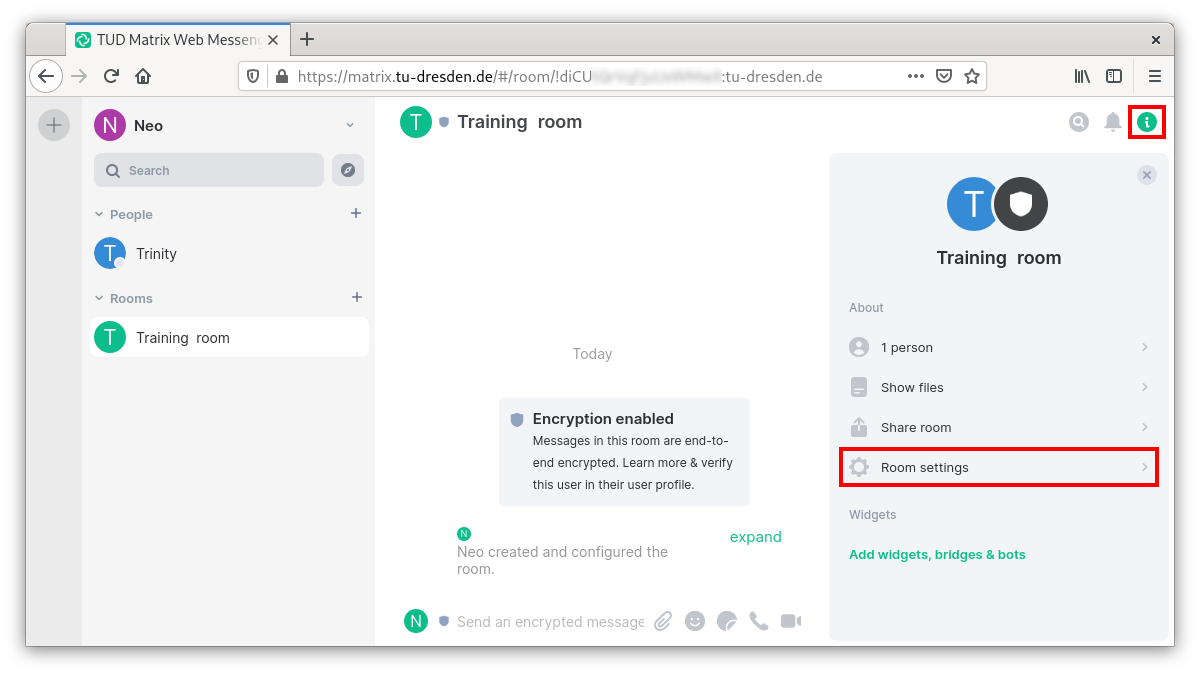
The room is now created and gets any colored icon color. By clicking on the i in the upper right corner and then the gear wheel “room settings” you can access exactly those room settings:
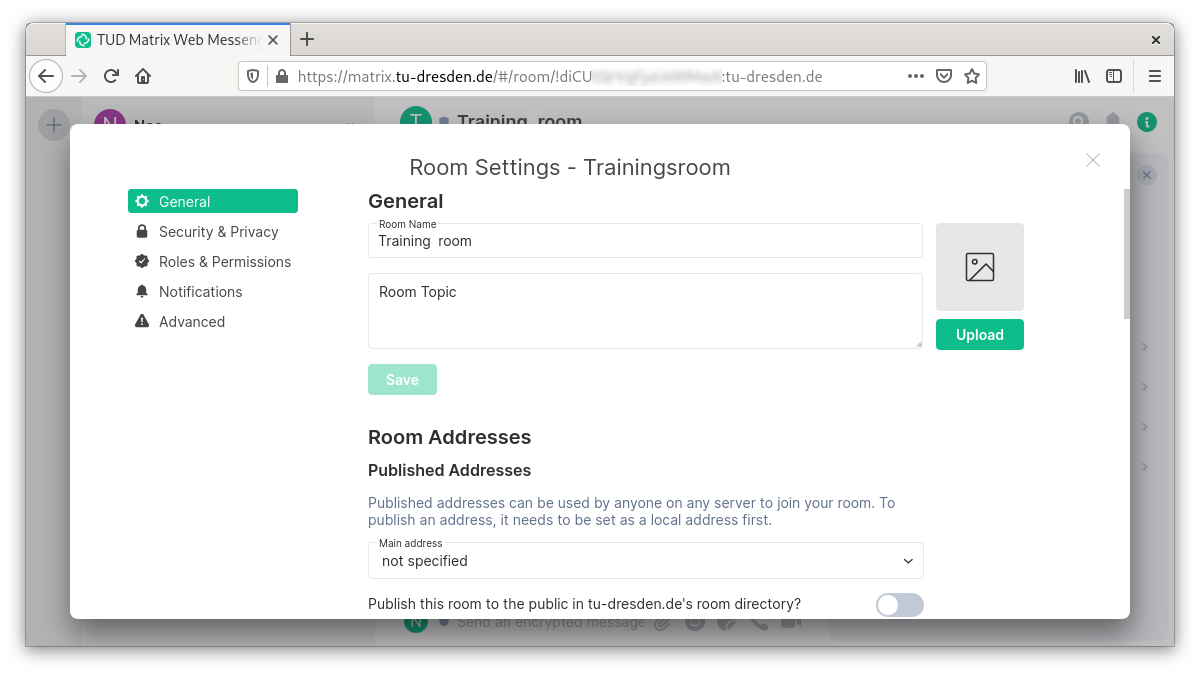
Here you can upload a room-specific image/icon in the General tab. An important feature is the assignment of a local room address. This address is easier to read by humans than the cryptic room address, which is always present in parallel (you can see it in the tab Advanced). The assigned local room address can then easily be distributed in public or to the target group and has the following structure:
#roomaddress:tu-dresden.de
Another important setting here is whether the room should appear in the room directory of the TU Dresden. You can also activate the URL preview for the room here.
In the Security & Privacy tab, room administrators have to make important decisions: Should the room be encrypted? Who is allowed access? And who can read the chat history?
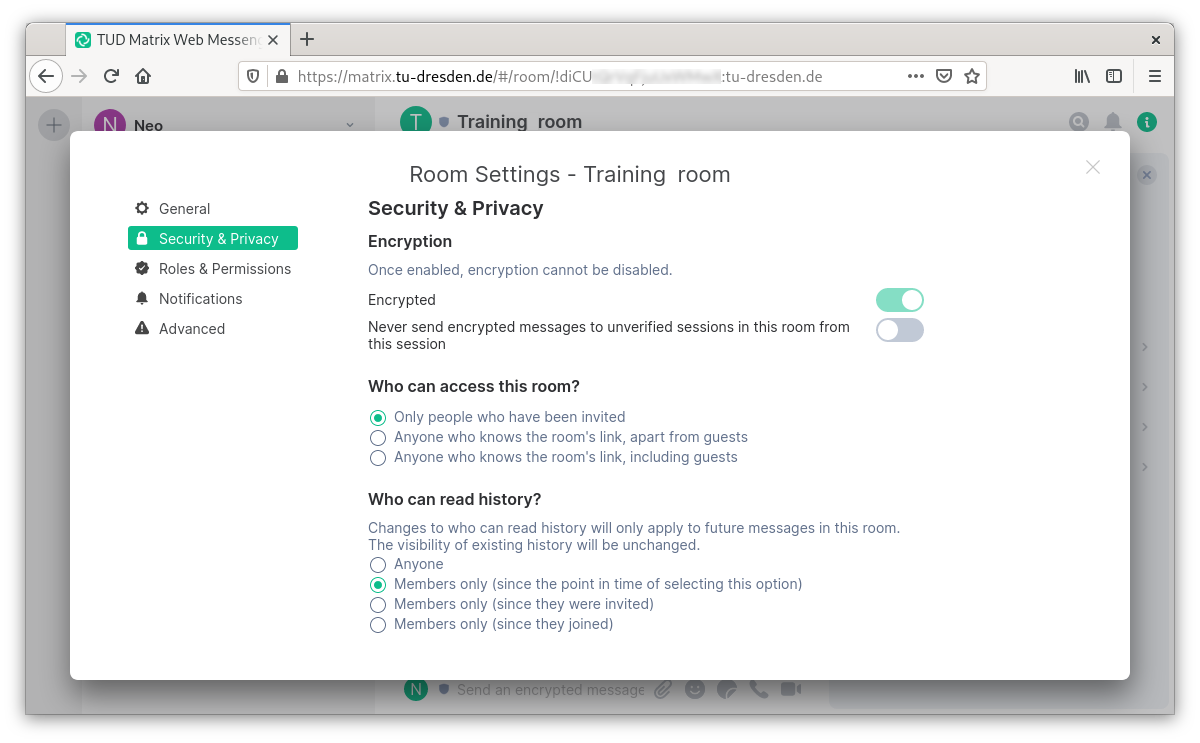
To explain the room access options:
- “Only people who have been invited”: These are closed rooms. Access at the moment only by explicit invitation by moderator:inside or administrator:inside
- “Everyone who knows the room link (except guests)”: This is a public room, but you can only read it if you enter it (and thus become visible to all room members). Here you can see exactly who is in the room and when, and if necessary you can kick and ban people who should not be in the room…
- “Everyone who knows the room link (including guests)”: This is a public room, and everyone can read it. All over the world. And room members will never know who read it and when. So this is like a website where everyone can take notes. This setting often goes along with the option that “everyone” can read the chat history.
A “call waiting” to closed rooms is not yet possible. The closest workaround is to send a direct message to the room administrator, who will then invite you.
The end-to-end encryption of large or public spaces is critical in terms of the difficult verification for many people. See Use end-to-end encryption.
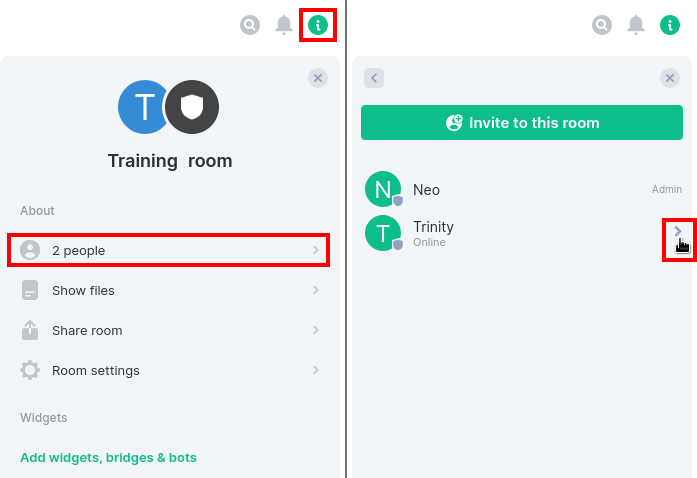
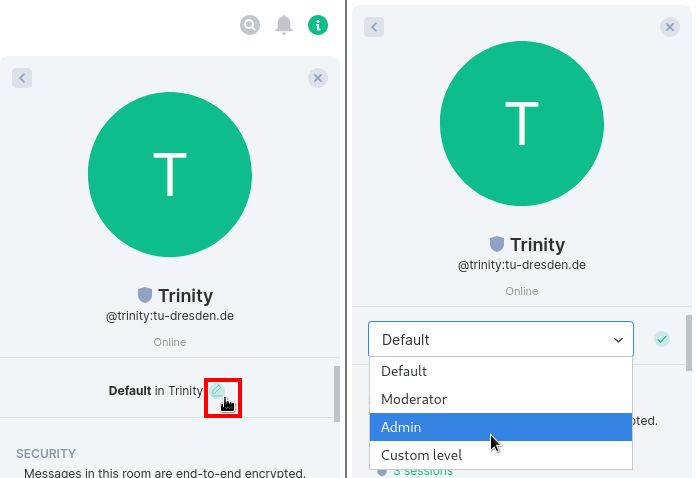
As the room administrator, you have responsibility for the content shared in the room (e.g. false messages, hate mail, etc.). Include other people in this responsibility by assigning roles in the right bar (after clicking on the person icon) via the “Permission Level” drop-down menu, e.g. Administrator:inside or Moderator:inside.
You can also use the admin tools to react to any misbehavior (mute, kick, ban, delete recent messages).